Growing Brussels sprouts at home might seem intimidating at first. These tiny green orbs take patience and care, but they’re worth the effort. And honestly, once you understand what these plants need, they’re not much harder to grow than other vegetables.
This guide walks you through everything you need to know, from planting seeds to harvesting your first crop. Let’s get started.
What Are Brussels Sprouts?
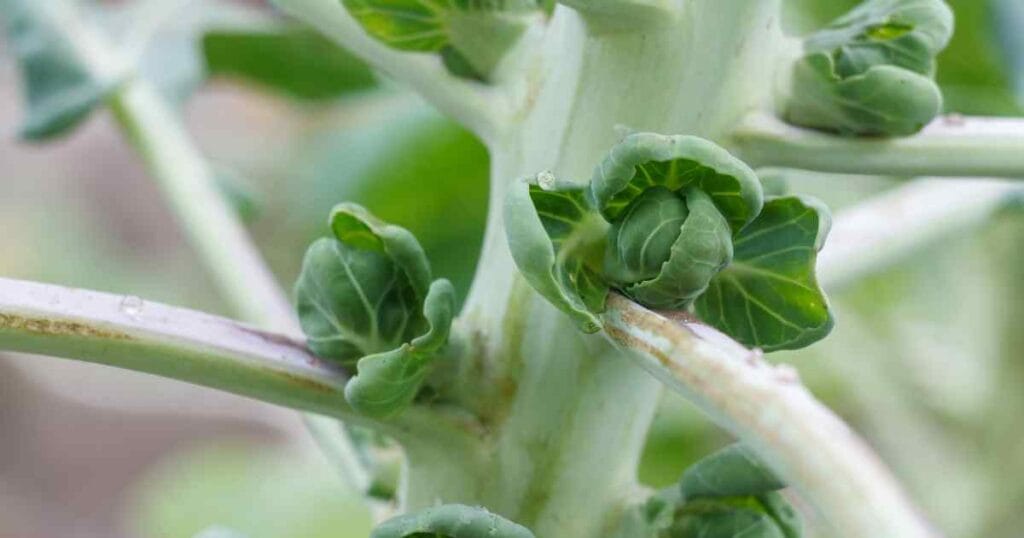
Brussels sprouts are basically tiny cabbages that grow on a tall stalk. They belong to the same plant family as broccoli, cauliflower, and kale – called brassicas. The plant grows 2-3 feet tall and produces dozens of small sprouts along its main stem.
Each plant typically produces 50-100 sprouts over several weeks. The sprouts form where the leaves meet the stem, starting at the bottom and working their way up. As the plant grows taller, more sprouts develop.
These vegetables love cool weather. In fact, many gardeners say Brussels sprouts taste better after a light frost. The cold converts some of their starches into sugars, making them sweeter and less bitter. If you’ve only eaten Brussels sprouts from the grocery store, you’re in for a treat when you grow your own.
When to Plant Brussels Sprouts

Timing matters with Brussels sprouts. These plants need a long growing season – about 80 to 100 days from transplant to harvest. But they also need to mature during cool weather. The sweet spot is when daytime temperatures stay between 60-70°F.
For most areas:
- Start seeds indoors 12-14 weeks before your first fall frost
- Transplant seedlings outside 6-8 weeks before the first fall frost
- In mild winter areas (zones 8-10), plant in late summer for a winter harvest
- In very cold areas (zones 3-4), plant in early spring for a summer harvest
Here’s a practical example: If your first frost typically hits in mid-October, start seeds indoors in early June and transplant outside in early August. This gives your plants time to grow during warm weather but mature when it’s cool.
Quick reference by region:
- Northeast: Start seeds late May to early June
- Southeast: Start seeds in July to August
- Midwest: Start seeds early to mid-June
- Pacific Northwest: Start seeds from June to July
- Southwest: Start seeds in August to September
Choosing the Right Variety
Not all Brussels sprouts are the same. Some varieties work better for beginners, while others need more experience to grow well.
Good beginner varieties:
- Long Island Improved – Classic variety, produces uniform 1.5-inch sprouts. Ready in 90 days. Grows 24 inches tall.
- Jade Cross – Disease resistant, matures in about 85 days. Produces very tight, sweet sprouts. Good for areas with unpredictable weather.
- Diablo – Good for small spaces, produces purple sprouts that turn green when cooked. Ready in 110 days. Kids love the color.
- Dagan – Quick maturing at 75 days. Compact plants perfect for containers or small gardens.
For more experienced gardeners:
- Red Darling – Red variety with nutty flavor. Takes 140 days.
- Falstaff – Purple-red variety. Needs very cool weather to develop color.
Pick a variety based on your growing season length and available space. Check seed packets for days to maturity and plant height. Remember that “days to maturity” means days from transplant, not from seed.
Starting Seeds Indoors
Brussels sprouts germinate best at temperatures between 65-75°F. Too hot or too cold, and they won’t sprout properly.
What you need:
- Seed starting mix (not regular potting soil – it’s too heavy)
- Small pots or seed trays with drainage holes
- Brussels sprout seeds
- Water
- A warm spot or heat mat
- Grow lights or a very sunny window
Steps:
- Fill containers with moist seed starting mix. The mix should feel like a wrung-out sponge.
- Plant seeds ¼ inch deep. Plant 2-3 seeds per pot in case some don’t germinate.
- Cover containers with plastic wrap or a humidity dome to keep moisture in.
- Keep soil moist but not waterlogged. Use a spray bottle to avoid disturbing seeds.
- Place in a warm spot until seeds germinate (7-10 days). The top of your refrigerator often works well.
- Remove the cover and move to a bright light once the seedlings emerge.
- Thin to one plant per pot when seedlings have two true leaves (not the first round leaves).
Your seedlings need at least 6 hours of direct light daily. A sunny south-facing window works, but grow lights give better results. Keep lights 2-4 inches above seedlings and raise them as plants grow.
Common seed starting mistakes:
- Planting too deep (seeds need some light to germinate)
- Keeping soil too wet (causes damping off disease)
- Not enough light (makes seedlings tall and weak)
- Starting too late (doesn’t leave enough growing time)
Preparing Your Garden Bed
Brussels sprouts are heavy feeders. They need rich, well-draining soil to produce a good crop. Poor soil means small, loose sprouts or no sprouts at all.
Soil requirements:
- pH between 6.0 and 7.0 (slightly acidic to neutral)
- Rich in organic matter
- Good drainage (standing water kills these plants)
- Previously grew beans, peas, or lettuce (good crop rotation)
Bed preparation steps:
- Choose a spot with full sun (6+ hours daily). Some afternoon shade is okay in hot climates.
- Test your soil pH with a kit from the garden center. Adjust if needed with lime (to raise) or sulfur (to lower).
- Work compost into the soil – about 2-3 inches mixed into the top 6-8 inches. This adds nutrients and improves drainage.
- Add a balanced fertilizer (like 10-10-10) according to package directions. Usually about 2 pounds per 100 square feet.
- Make sure the bed drains well after rain. If water pools, add more compost or create raised beds.
Raised bed option: If your soil is heavy clay or doesn’t drain well, build raised beds at least 8 inches tall. Fill with a mix of:
- 40% compost
- 40% topsoil
- 20% perlite or coarse sand
This mix provides nutrients while ensuring good drainage.
Transplanting Seedlings Outside
Wait until seedlings are 4-6 inches tall before transplanting. They should have at least 4-6 true leaves and sturdy stems. Weak, leggy seedlings won’t produce good crops.
Hardening off (super important!): Before planting, seedlings need to adjust to outdoor conditions. Skip this step, and your plants might die from shock.
Week-long hardening schedule:
- Day 1-2: Place seedlings outside for 2 hours in the shade
- Day 3-4: Increase to 4 hours with some morning sun
- Day 5-6: Leave out 6 hours with more direct sun
- Day 7: Leave out all day, bring in only if frost threatens
If temperatures drop below 50°F or winds are strong, bring plants inside.
Planting day checklist:
- Choose a cloudy day or plant in the evening (reduces transplant shock)
- Water seedlings well before removing from pots
- Space plants 18-24 inches apart (they need room to grow)
- Plant rows 30 inches apart for easy access
- Dig holes slightly larger than the root ball
- Mix a handful of compost into each planting hole
- Plant seedlings at the same depth they grew in pots (up to the first true leaves is okay)
- Firm soil gently around roots
- Water thoroughly after planting – really soak them
- Consider using row covers for the first week to protect from pests
Caring for Your Plants
Brussels sprouts need consistent care throughout their growing season. But once you get into a routine, it’s pretty straightforward.
Watering:
- Provide 1-1.5 inches of water weekly (use a rain gauge to track)
- Water deeply once or twice a week rather than light daily watering
- Water the soil level to prevent disease (wet leaves encourage fungus)
- Use mulch to retain moisture – 2-3 inches of straw or shredded leaves works great
- Don’t let the soil dry out completely (causes bitter sprouts)
How to check if plants need water: Stick your finger 2 inches into the soil. If it’s dry, water. If it’s moist, wait a day and check again.
Fertilizing schedule:
- At planting: Work in compost and balanced fertilizer
- 3 weeks after planting: Side-dress with compost or apply liquid fertilizer
- Every 3-4 weeks after: Feed with balanced fertilizer (follow package rates)
- When sprouts start forming: Switch to low-nitrogen fertilizer (like 5-10-10)
Signs plants need fertilizer:
- Lower leaves are turning yellow
- Slow growth
- Small sprouts
- Purple-tinged leaves (phosphorus deficiency)
Supporting plants: Brussels sprouts can get top-heavy, especially when loaded with sprouts. In windy areas, stake plants when they reach 18 inches tall. Use 4-foot stakes and tie plants loosely with soft ties. Don’t use wire or string that can cut into stems.
Mulching benefits:
- Keeps soil moist
- Prevents weeds
- Keeps soil cool
- Adds organic matter as it breaks down
Common Problems and Solutions
Even experienced gardeners face challenges with Brussels sprouts. Here are the most common issues and how to handle them.
Pests:
Cabbage worms (the most common problem)
- What they look like: Green caterpillars up to 1 inch long
- Damage: Large holes in leaves, droppings on plants
- Solution: Hand-pick daily or use row covers. But spray works for bad infestations
Aphids
- What they look like: Tiny green or gray insects clustered on leaves
- Damage: Curled leaves, sticky honeydew, stunted growth
- Solution: Spray off with a strong water stream. Repeat every few days
Flea beetles
- What they look like: Tiny black beetles that jump when disturbed
- Damage: Small round holes in leaves (looks like shotgun damage)
- Solution: Row covers on young plants. Diatomaceous earth around plants
Cabbage loopers
- What they look like: Green inchworms that arch when moving
- Damage: Similar to cabbage worms
- Solution: Same as cabbage worms
Diseases:
Clubroot
- Symptoms: Stunted growth, yellowing leaves, swollen roots
- Cause: Soil fungus in poorly drained soil
- Solution: Improve drainage, add lime to raise pH, and rotate crops for 4 years
Black rot
- Symptoms: V-shaped yellow areas on leaf edges, black veins
- Cause: Bacteria spread by water splash
- Solution: Remove affected plants, avoid overhead watering, and clean tools
Powdery mildew
- Symptoms: White powdery coating on leaves
- Cause: Fungus in humid conditions
- Solution: Improve air circulation, remove affected leaves, and spray with neem oil
Growing problems:
Loose or no sprouts forming
- Causes: Too much heat, too much nitrogen fertilizer, planted too late
- Solution: Time planting correctly, reduce nitrogen after plants establish
Sprouts are opening too early
- Cause: Usually heat stress or irregular watering
- Solution: Keep soil consistently moist, provide shade in hot weather
Bitter taste
- Cause: Heat stress, drought stress, harvesting too early
- Solution: Wait for cool weather and frost before harvesting
When and How to Harvest
Brussels sprouts mature from the bottom up. The lower sprouts get firm first, while the upper ones are still developing. This extended harvest is actually great – you get fresh sprouts for weeks.
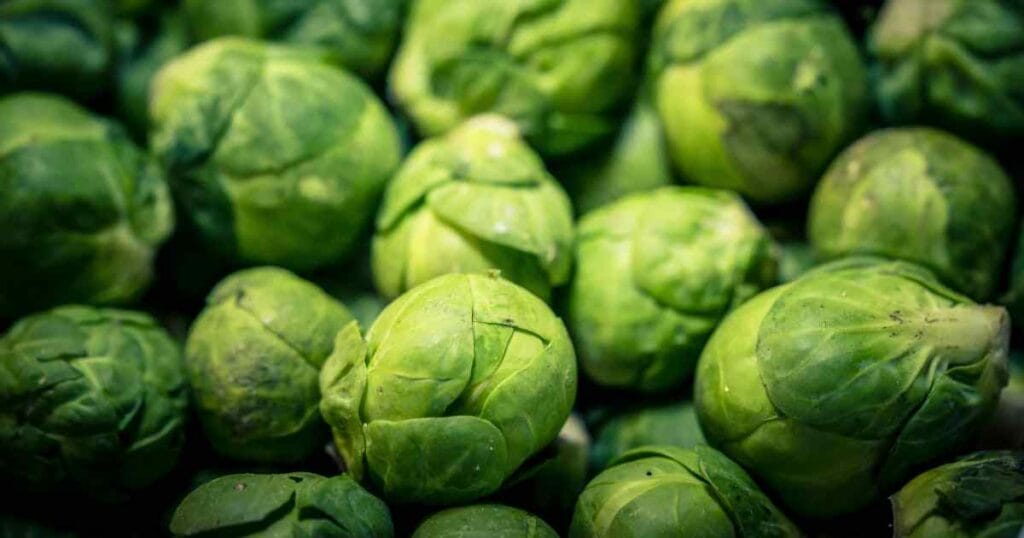
Signs sprouts are ready:
- Firm and solid when squeezed gently
- About 1-2 inches in diameter (size of a walnut)
- Bright green color
- Tight leaves that don’t separate easily
- Been through at least one light frost (for best flavor)
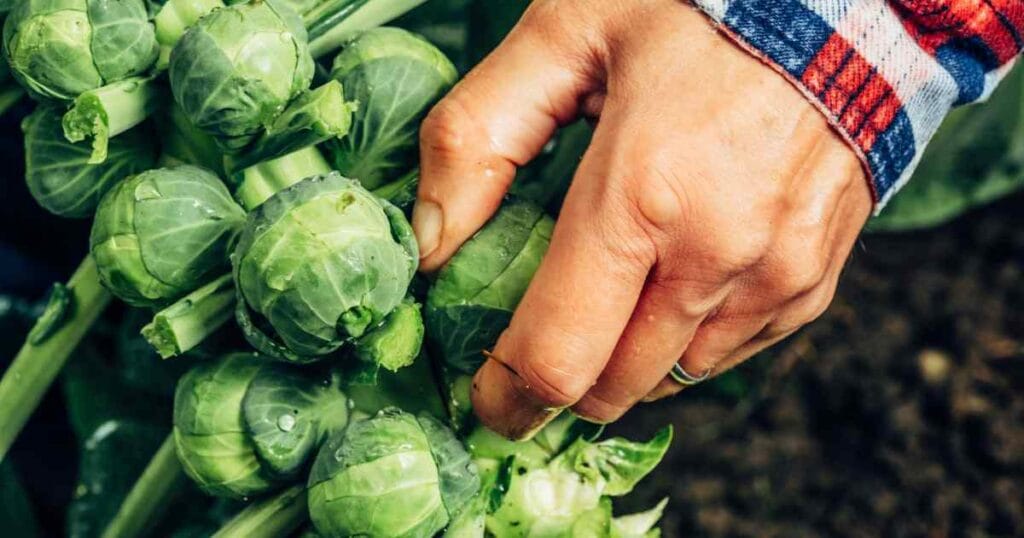
Two harvesting methods:
1. Individual picking (recommended for home gardens)
- Start at the bottom of the stalk
- Twist sprouts off or cut with a sharp knife
- Remove yellowing leaves below harvested sprouts
- Leave the top leaves intact (they feed developing sprouts)
- Check every 5-7 days for newly mature sprouts
- Can harvest for 6-8 weeks this way
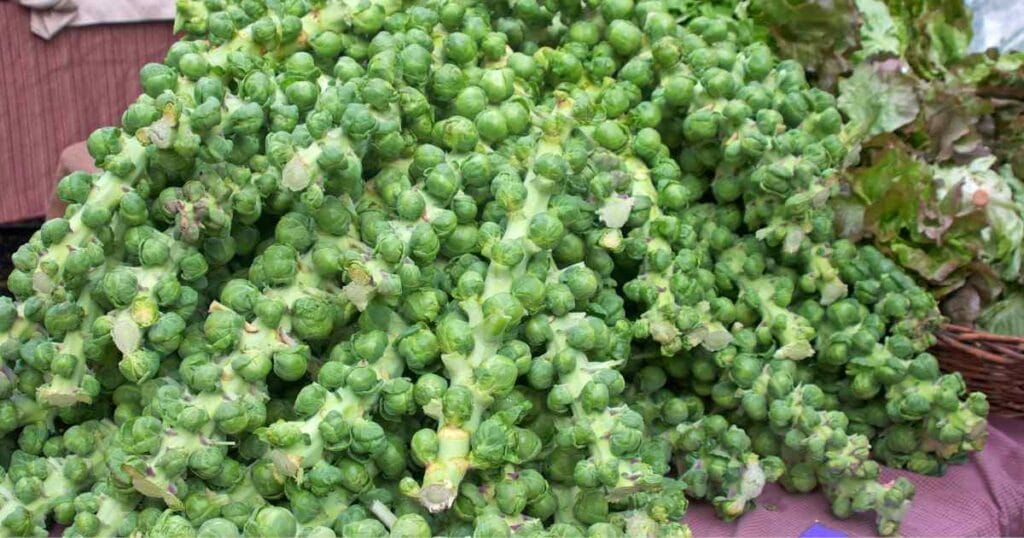
2. Whole stalk harvest
- Wait until most sprouts are mature
- Cut the entire stalk at ground level
- Can store whole stalk in a cool place for 3-4 weeks
- Good for ending the season before a hard freeze
Harvesting tips:
- Start checking sprouts about 80 days after transplanting
- Don’t wait too long – overripe sprouts turn yellow and taste bitter
- Harvest in cool weather when possible (morning is best)
- The small sprouts at the very top might never size up – that’s normal
Extending the harvest: About 3 weeks before you want to finish harvesting, cut off the growing tip of the plant. This forces the plant to put energy into sizing up existing sprouts rather than growing taller.
Storing Your Harvest
Fresh Brussels sprouts keep well when stored properly. Way better than most vegetables.
Short-term storage (refrigerator):
- Don’t wash until ready to use
- Remove any yellowing outer leaves
- Place in a perforated plastic bag (poke a few holes)
- Store in crisper drawer
- Keeps 3-5 weeks
- Check weekly and remove any that start to yellow
Long-term storage (freezer):
- Select firm, green sprouts
- Trim stems and remove loose leaves
- Blanch in boiling water (3 minutes for small, 5 for large)
- Plunge into ice water to stop cooking
- Drain thoroughly
- Pack in freezer bags, removing air
- Label with date
- Frozen sprouts keep 10-12 months
Root cellar storage: If you have a cool basement or garage that stays 32-40°F:
- Pull up entire plants before the ground freezes
- Shake off soil, but don’t wash roots
- Hang plants upside down or “plant” in buckets of moist sand
- Can keep 4-6 weeks this way
In-garden storage: In mild winter areas (zones 7-10), you can leave plants in the garden. They tolerate temperatures down to about 20°F. Mulch heavily around plants for extra protection. Harvest as needed through winter.
Tips for Success
After growing Brussels sprouts for several seasons, these tips make the biggest difference:
Planning tips:
- Start early enough – Most failures come from planting too late. Mark your calendar for spring.
- Succession plant – Start new seeds every 2 weeks for an extended harvest
- Rotate crops – Don’t plant where other brassicas grew for 3-4 years
Growing tips:
- Keep soil moist – Dry soil produces loose, bitter sprouts. Mulch helps tremendously.
- Feed regularly – These heavy feeders need consistent nutrition
- Remove lower leaves – As you harvest, remove leaves to improve air circulation
- Be patient – These plants take time but produce for weeks
Problem prevention:
- Use row covers – Prevents most pest problems before they start
- Space properly – Crowded plants get more disease
- Pick regularly – Harvesting encourages more sprout development
- Keep garden clean – Remove plant debris that harbors pests
Companion planting: Good companions: beets, carrots, onions, marigolds, nasturtiums. Avoid planting near: strawberries, tomatoes, and pole beans.
Final Thoughts
Growing Brussels sprouts takes commitment. They occupy garden space for months and need regular attention. But fresh homegrown sprouts taste nothing like store-bought ones. The flavor is sweeter, nuttier, and worth every bit of effort.
Start with just 4-6 plants your first year. That’s enough to learn what works in your garden while still getting a good harvest. Each season gets easier as you understand what these plants need.