I used to throw away things like lettuce stumps, green onion roots, and garlic cloves without thinking twice. They just seemed like kitchen scraps, right? But I later discovered that many of these are actually vegetables you can regrow from scraps. They can turn into fresh, edible vegetables all over again.
Regrowing veggies from scraps is not just a money-saver, it’s also surprisingly fun. There’s something really satisfying about watching those tiny green shoots pop up and knowing you’re giving new life to something most people toss out. Plus, it’s a great way to cut down on waste.
In this article, I’m going to walk you through 14 vegetables you can easily regrow from your kitchen scraps. You don’t need a big garden or fancy tools, just a bit of patience and some sunlight. By the end, you’ll be itching to grab those leftover bits from your chopping board and turn them into your own mini harvest. Let’s jump in!
Why Regrow Vegetables at Home?
So, why even bother regrowing veggies from scraps? Well, once I started doing it, I wondered why I hadn’t been doing this all along.
First off, you save money. Think about it, instead of buying a fresh bunch of green onions every week, you can just snip some from the ones growing on your windowsill. It might not sound like a lot at first, but over time, it really adds up.
Then there’s the waste factor. We all throw away way more food than we should, and this is such an easy way to cut back. Instead of tossing those celery ends or basil stems, you give them a second life. It feels good knowing you’re doing something small but helpful for the planet.
Another reason? Freshness. Nothing beats plucking herbs or greens you’ve regrown yourself. It’s a nice little flex too, imagine telling your friends, “Oh, these herbs? Yeah, I grew them from scraps.”
And finally, it’s just plain fun. Watching a sad-looking veggie stump sprout back to life is honestly kind of magical. If you’ve got kids, they’ll love it. If you don’t, you’ll still probably find yourself checking on your little jars of water like they’re pets.
Alright, now that you know why this is worth trying, let’s roll up our sleeves and look at what tools you’ll need to get started. (Don’t worry, you probably already have most of them!)
Tools You’ll Need (Don’t Worry – Simple Stuff!)
You don’t need a fancy setup or expensive gadgets to regrow veggies at home. When I first started, I just grabbed whatever I had lying around in the kitchen, and honestly, that’s all you need to get going.
Here’s a quick list of the basics:
- Jars or glasses → These are perfect for holding things like green onions, celery, or lettuce bases in water. Mason jars, old jam jars, or even a drinking glass will do the job.
- Small pots or containers → Once the roots start showing, some plants will need to move into soil. You can reuse yogurt cups, old tins, or small pots. Just make sure they have drainage holes.
- Potting soil → You don’t need a giant bag, just enough for a few small pots. A decent-quality mix from the store works great.
- Sharp knife or scissors → For trimming and prepping the scraps. Dull tools can crush the plant instead of giving it a clean cut.
- Water and sunlight → Yep, that’s it! A sunny windowsill will work wonders. If you don’t have much natural light, a small grow light can help (but don’t stress, start with what you have).
That’s all you need to turn scraps into a mini harvest. Every day stuff you probably already have in your kitchen.
Alright, now that you’re set up, let’s dive into the fun part: the 14 vegetables you can regrow and exactly how to do it!
The 14 vegetables you can regrow from scraps
I’m going to walk you through 14 veggies that are super easy to regrow at home. Some of these will sprout in just a few days (hello, green onions!), while others will take a little longer. But watching them come back to life is half the fun. Ready? Let’s dig in!
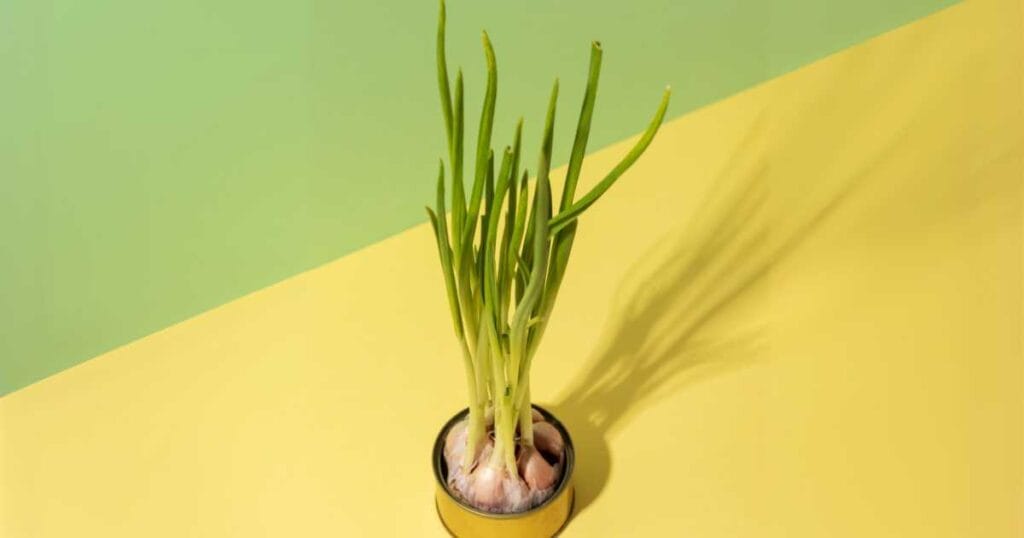
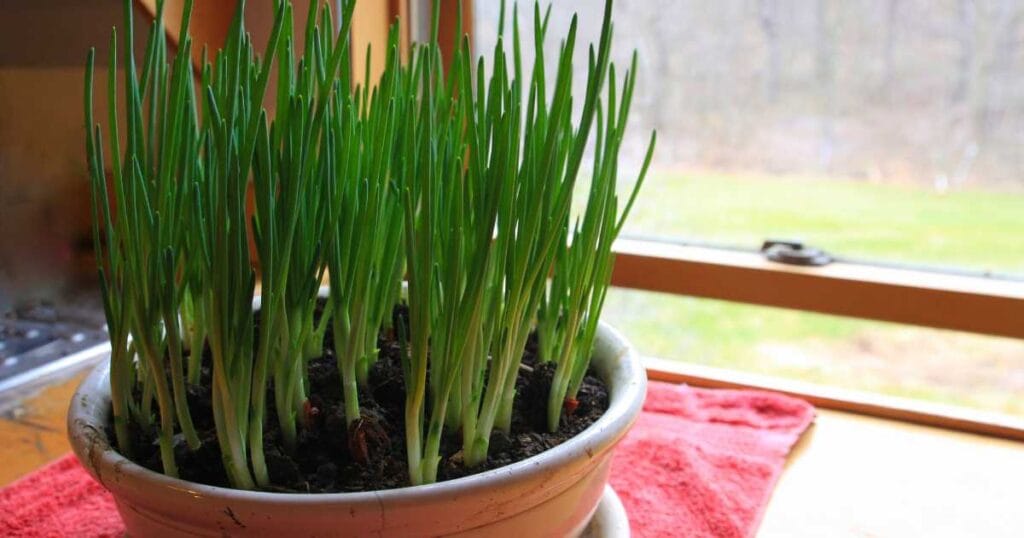
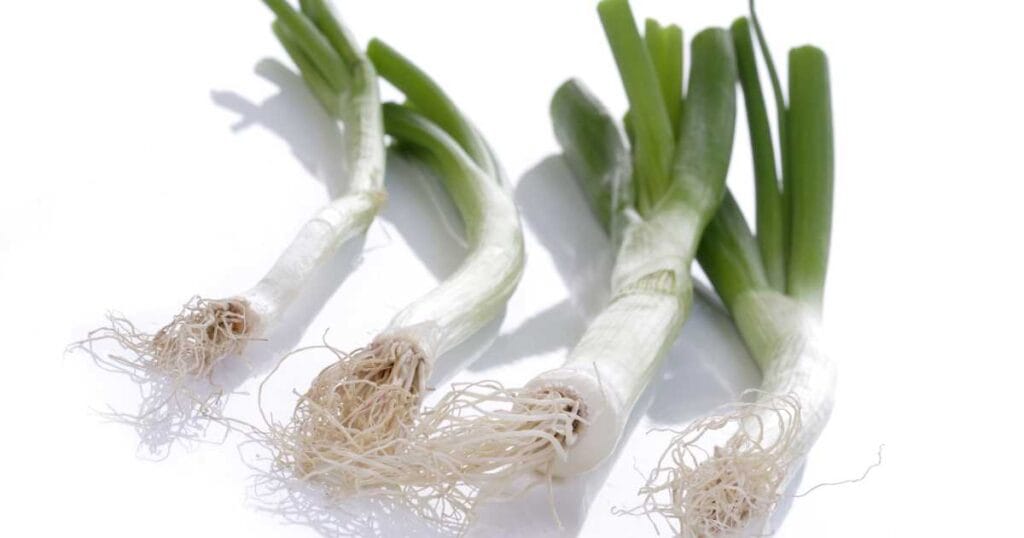
1. Green Onions (Scallions)
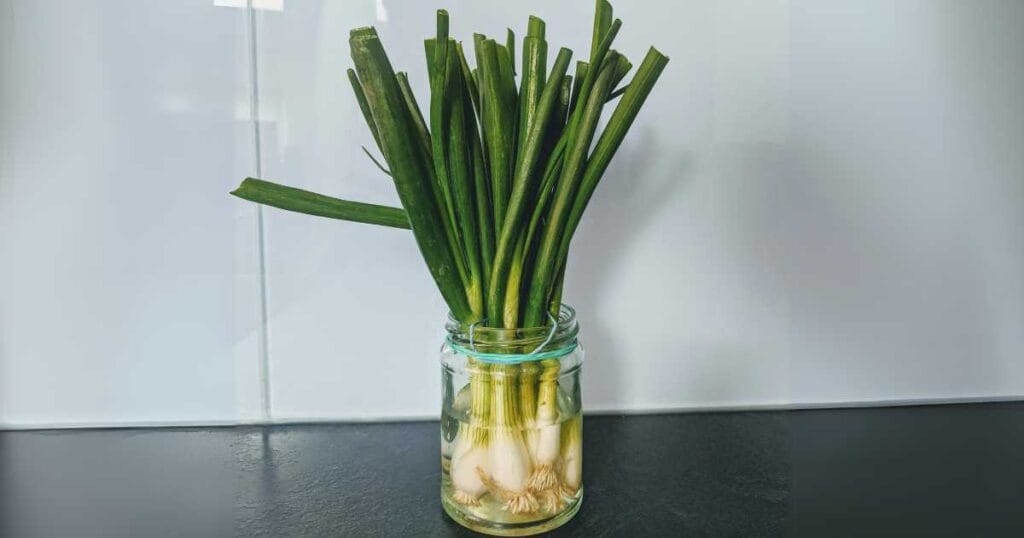
Green onions are probably the easiest and fastest veggie to regrow. They’re where I tell everyone to start.
Just take the white root ends (about 2-3 inches long), pop them in a glass of water so the roots are covered, and set them on a sunny windowsill. You’ll see new green shoots popping up in just a few days. Change the water every couple of days to keep it fresh.
Once they get nice and tall again (usually in a week or so), you can either snip what you need or plant them in a small pot with soil to keep them going even longer.
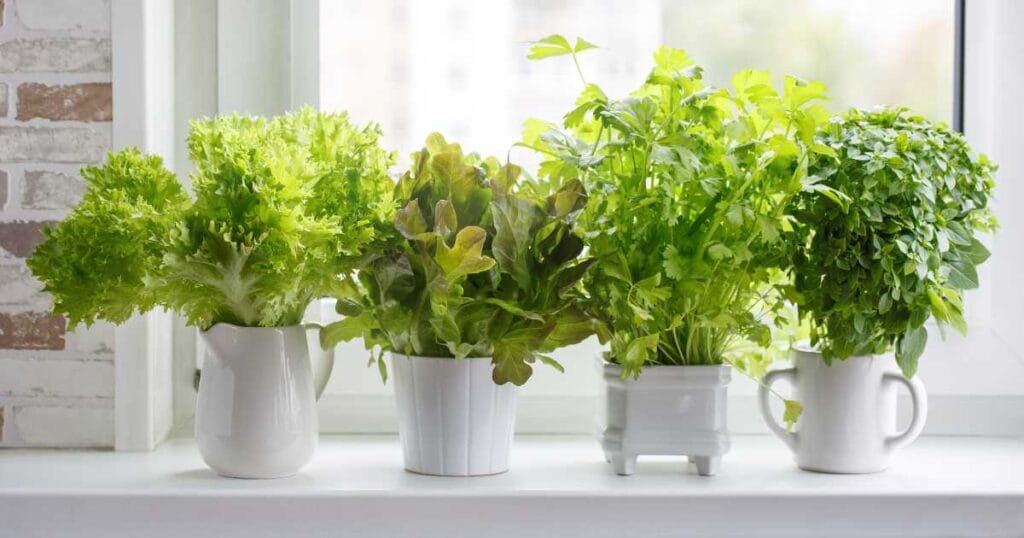
2. Lettuce (Romaine, Butter, or Leaf Lettuce)
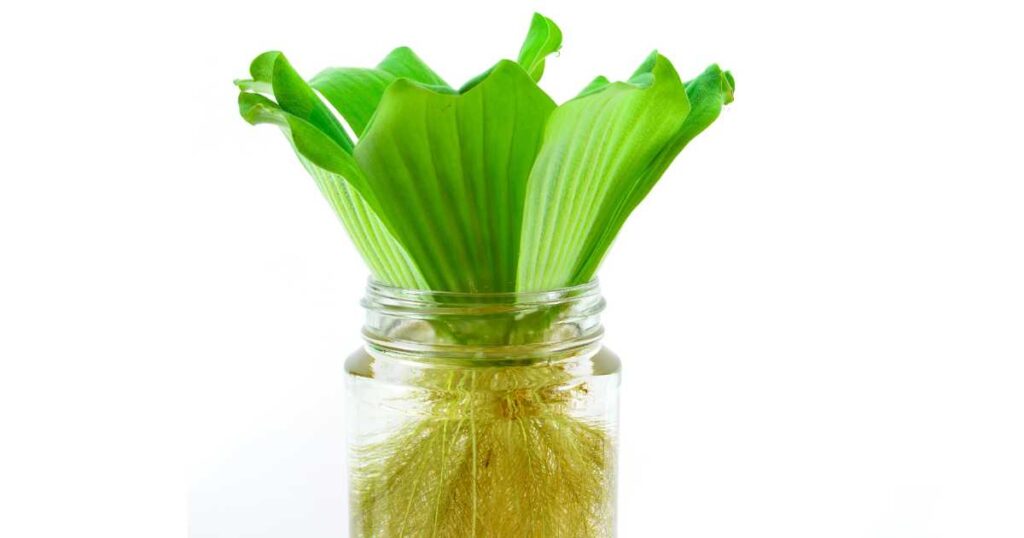
Instead of tossing the bottom stump of your lettuce head, place it in a shallow bowl with a bit of water at the bottom. Make sure the cut side faces up.
Leave it somewhere sunny, and in a few days, you’ll notice tiny leaves growing from the middle. Keep changing the water every couple of days. Once it’s about 2-3 inches tall, you can transfer it to a pot with soil if you want it to grow bigger, or you can snip off the fresh leaves for a quick salad topper.
3. Celery
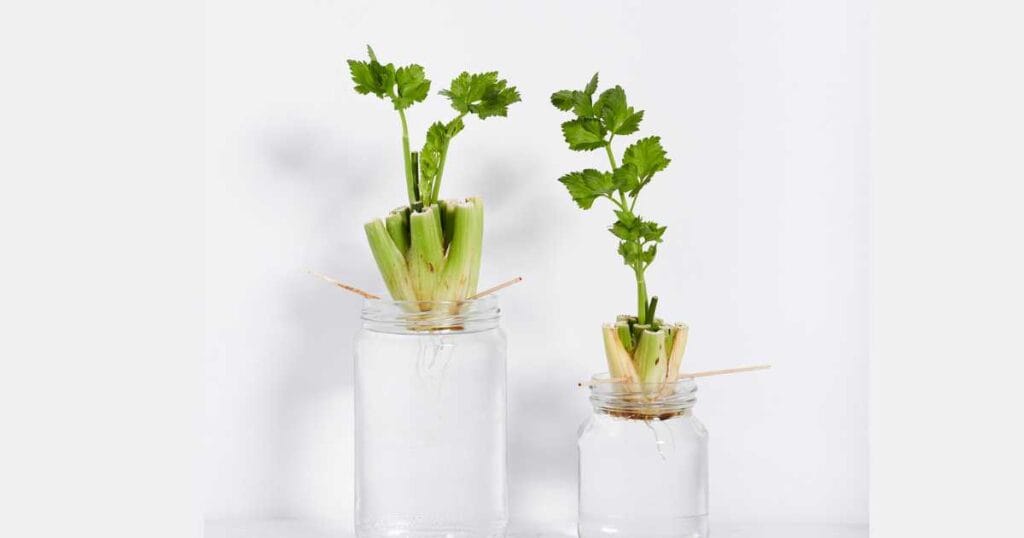
Celery works a lot like lettuce. Cut off the base, about 2 inches from the bottom, and place it in a shallow dish with a little water.
Put it in a sunny spot, and soon you’ll see small leaves sprouting from the center. Keep the water fresh, and when you spot roots at the bottom, it’s ready to be moved to a pot with soil. In a few weeks, you’ll have crunchy homegrown celery to add to your cooking.
4. Carrot Tops (for greens, not new carrots)
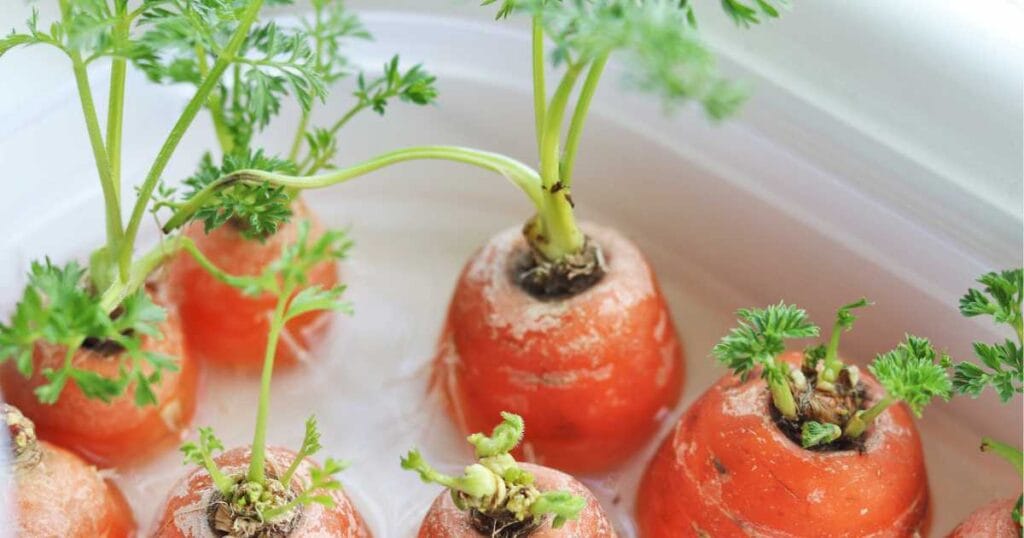
Here’s one most people don’t know, you can regrow carrot tops, but not the orange root itself. Take the top inch of the carrot (where the leafy greens were), place it in a shallow dish with water, and set it in a sunny spot.
Before long, little green leaves will start to appear. While you won’t get new carrots, these greens are tasty and can be used in salads, pesto, or even as a garnish.
Bonus: they look really cute on your windowsill!
5. Basil
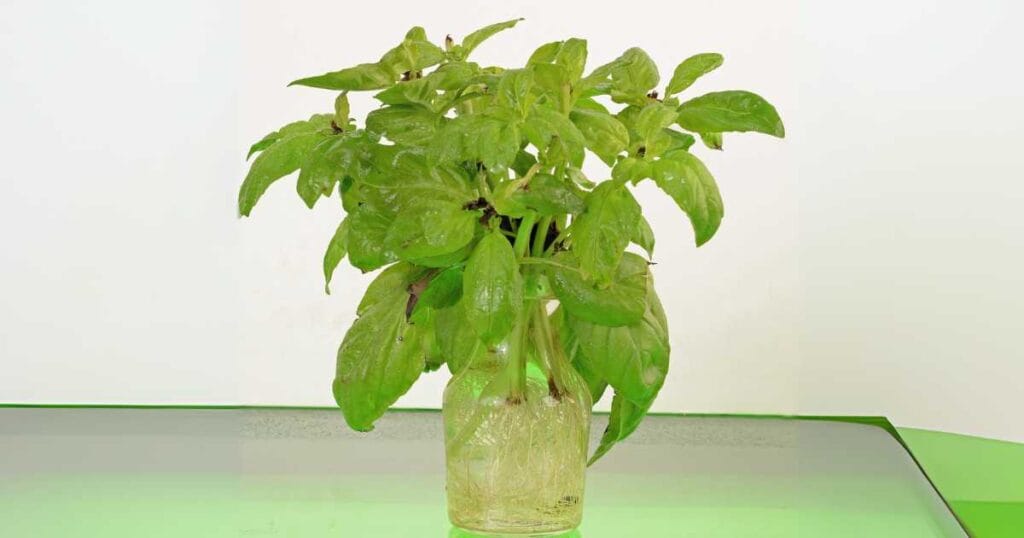
Basil is a total winner for the kitchen. Snip a 4- to 6-inch stem just below a leaf node (that little bump where leaves come out), remove the bottom leaves, and place the stem in a glass of water.
Keep it near sunlight, and change the water every few days. Once you see roots forming, usually in about a week or two, you can plant it in soil. Regularly pinch off the top leaves to keep the plant full and bushy. Trust me, having fresh basil on hand makes everything you cook taste a little more special.
6. Cilantro
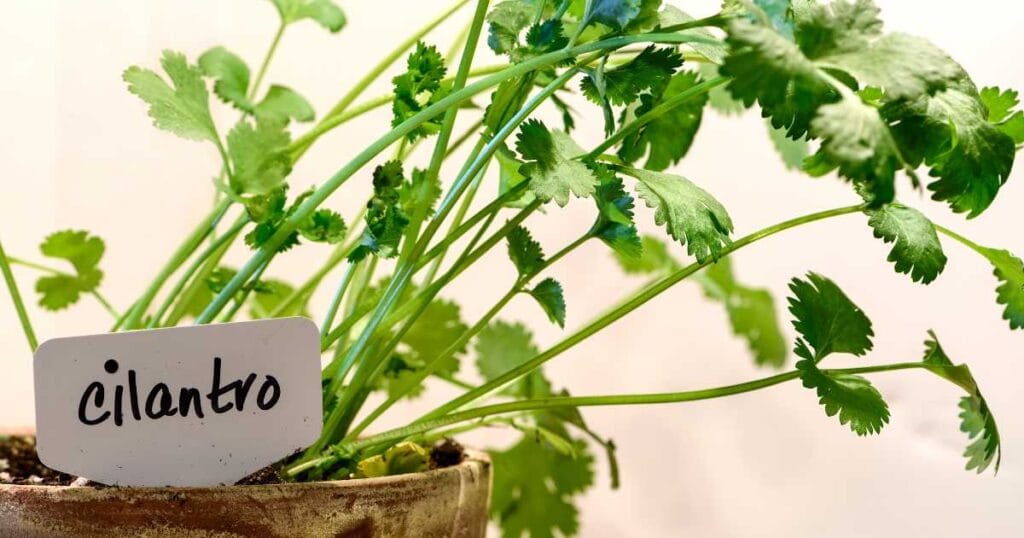
Cilantro can be a bit tricky, but once you get the hang of it, it’s so worth it. Especially if you love throwing fresh herbs onto tacos or into soups.
Take a few healthy stems with about 4-5 inches of length. Just like with basil, place the stems in a glass of water, making sure the bottom leaves are removed. Put the glass in a sunny spot and change the water every couple of days. When you see roots starting to form (usually after a week or two), plant them in a pot with soil. Keep the soil moist but not soggy, and you’ll have fresh cilantro to snip in no time.
7. Mint
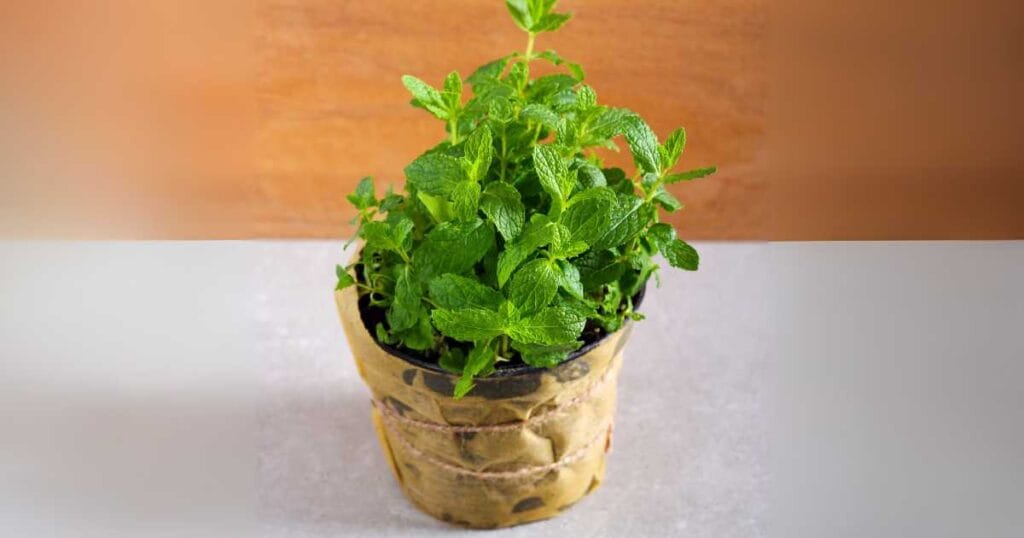
Mint is an absolute champ when it comes to regrowing. In fact, it grows so fast you might have to keep it in check!
Take a stem cutting about 4-6 inches long, remove the lower leaves, and place it in a glass of water. Find a nice sunny window and wait for roots to pop out. Once the roots are a couple of inches long, move the cutting to the soil. Mint grows like wildfire, so if you’re planting it outside, consider keeping it in a pot so it doesn’t take over your garden. Fresh mint in your tea or desserts is always a win.
8. Garlic
You can regrow garlic from a single clove. Take a healthy garlic clove (still in its papery skin) and plant it pointy-end-up in a small pot of soil, about an inch deep.
Keep the pot in a sunny spot and water lightly. Soon, you’ll see green shoots coming up, these are garlic greens, which have a mild garlicky flavor and are delicious in stir-fries or salads. If you’re patient (and I mean really patient), you can let it grow for months to form a whole new garlic bulb underground.
9. Ginger
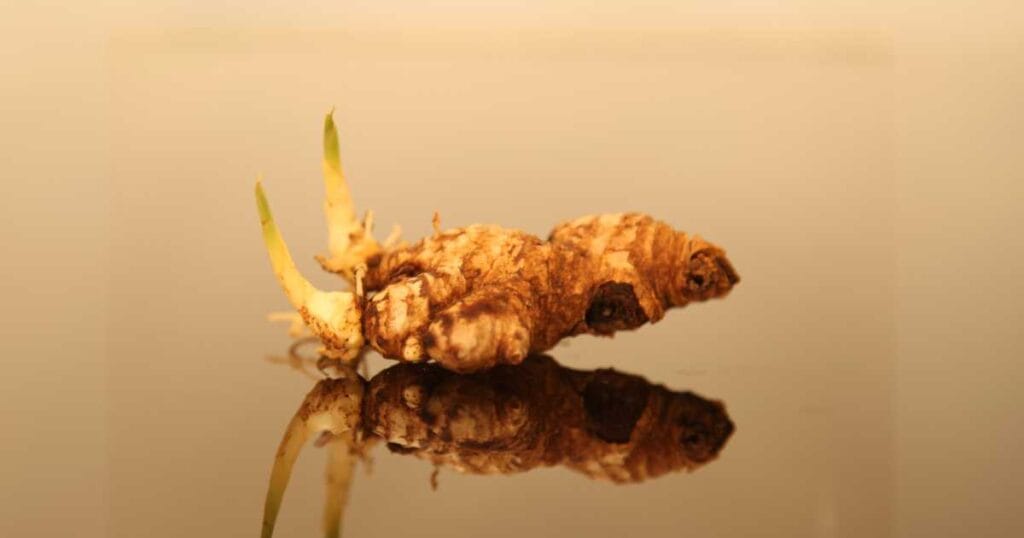
Ginger takes a bit more time, but it’s really satisfying when you see it sprout.
Find a piece of fresh ginger with visible “eyes” or little buds. Soak it in warm water overnight, then plant it in a pot with the buds facing up, about an inch below the soil. Keep the soil moist and the pot in a warm, lightly sunny spot. Ginger grows slowly, but after a few weeks, you’ll see shoots popping up. Give it a few months, and you can harvest fresh ginger from the roots.
10. Potato (Sweet or Regular)
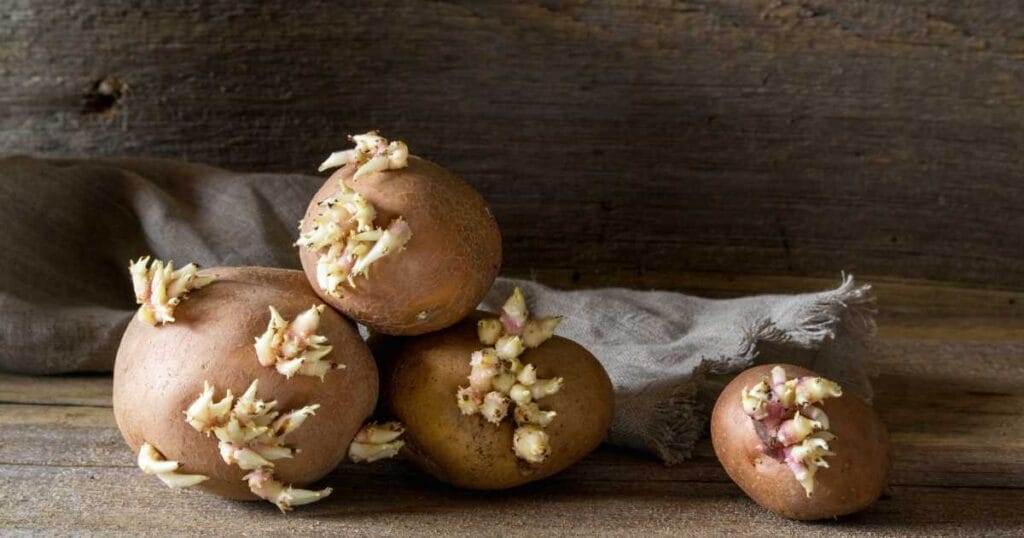
Don’t toss those old potatoes with sprouting eyes, they’re perfect for regrowing!
Cut the potato into chunks, making sure each piece has at least one eye. Let the pieces dry out for a day or two to prevent rot, then plant them in soil about 4 inches deep, eyes facing up. Water regularly, and in a few weeks, green shoots will appear. Once the plant grows big and starts to yellow, it’s harvest time! Dig into the soil, and you’ll find baby potatoes waiting for you.
11. Onion (Bulb Onions)
Got an onion that’s sprouting green shoots? Perfect, you’re already halfway there.
Cut off the bottom part of the onion, about an inch thick, where the roots are. Let it dry out for a few hours, then place it root-side down in a shallow dish of water. Keep it in a sunny spot, and soon you’ll see new roots forming. Once the roots look strong and you see some green growth on top, transfer it to soil. Give it time, and you’ll end up with a fresh onion to pull from your own pot or garden bed.
12. Leeks
Leeks are basically cousins to green onions when it comes to regrowing.
Save about 2 inches from the base of the leek, making sure the roots are still attached. Stand it in a glass of water, roots down, and place it in a sunny window. Change the water every few days, and you’ll soon spot green shoots sprouting from the middle. You can let them grow in water or transfer them to soil when the roots get longer. Either way, you’ll have a steady supply of fresh leek greens for soups and stir-fries.
13. Bok Choy
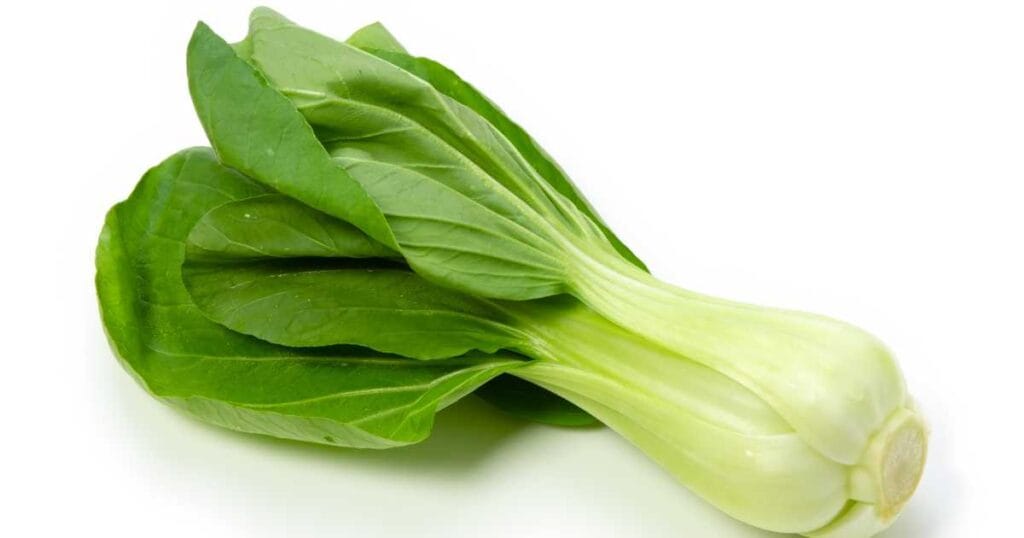
Bok choy is another veggie that bounces back beautifully from scraps.
Cut off the base, about 2 inches high, and place it in a shallow bowl with a bit of water. Put it where it gets good sunlight, and in a few days, you’ll notice small green leaves pushing up from the center. Change the water often, and once roots start showing, you can plant it in soil to grow a full new plant.
14. Peppers (Bell, Jalapeño, etc.).
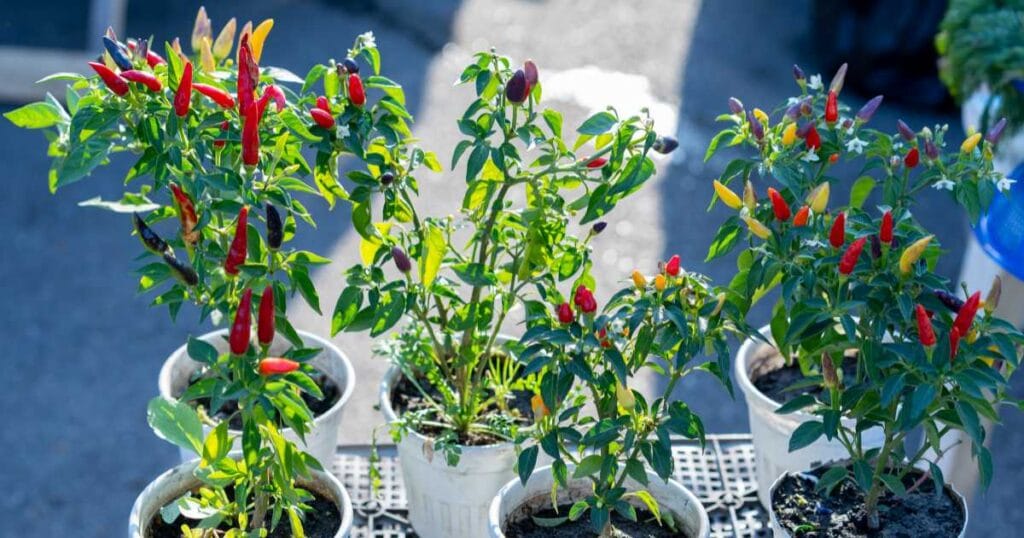
Next time you cut into a pepper, save some of the seeds. Rinse and dry them, then plant them about a quarter-inch deep in moist soil. Keep the pot somewhere warm and sunny, and be patient, pepper seeds take a little while to sprout. Once they do, you’ll have pepper plants that can go right onto your balcony or garden when the weather’s warm. With some care, you’ll be picking your own peppers before you know it.
Common Mistakes and How to Avoid Them
When I first started, I had my fair share of flops. Some scraps rotted, some never sprouted, and a few just plain gave up on me. But here’s the good news: most of these mistakes are easy to avoid once you know what to watch for.
- Using old or damaged scraps: One big mistake people make is using old or damaged scraps. If the base of your celery or the roots of your green onions are dried up or moldy, they’re probably not going to bounce back. Always pick the healthiest-looking pieces.
- Forgetting to change the water: Another common slip-up is forgetting to change the water. Trust me, I’ve had jars turn into stinky science experiments because I left the same water sitting for days. Fresh water every couple of days keeps things clean and gives your plants the best shot at thriving.
- Too little sunlight: This is another sneaky problem. While some veggies will sprout in low light, most need a sunny windowsill or balcony to really take off. And if you’re working with soil, overwatering can be just as harmful as forgetting to water. You want damp, not soggy.
- Impatientance: Finally, being impatient is something we’re all guilty of. Some plants, like green onions, will give you a quick reward, but others, like ginger or peppers, take weeks or even months. Keep an eye on them, care for them regularly, but don’t rush the process, the wait makes the harvest even sweeter.
Tips for Success and Long-Term Care
Now that you know what not to do, let’s chat about how to help your little veggie garden thrive for the long haul. Trust me, once you see those first green shoots, you’ll want to keep them happy and growing as long as possible!
- Give them enough light: Most regrown veggies love sunlight, so place them on a windowsill that gets good rays. If your home is a bit dark, don’t worry, you can always use a small, affordable grow light to help them along.
- Feed the soil: when you move it from water to dirt. A little compost or organic fertilizer will go a long way in helping your plants stay strong and productive. Without it, the soil can get “tired,” and your veggies might stop growing well.
- Trim regularly: For herbs like basil, mint, and cilantro, snipping the tops encourages the plants to grow bushier and fuller. It’s one of those rare times in life where the more you take, the more you get back!
- Rotate your plants: If they start leaning toward the light, give their pots a little turn every few days. This helps them grow straight and strong.
And last but not least, be patient and enjoy the process. Not everything will work perfectly every time; that’s just part of gardening. But even the flops teach you something, and honestly, watching scraps come back to life is half the fun.
How to Keep the Cycle Going (and Growing!)
Now that you’re enjoying your fresh regrown veggies, you might be wondering: how do I keep this cycle going? The good news is, once you get the hang of regrowing, it becomes a simple, ongoing process that can keep your kitchen stocked with fresh produce year-round.
First, start with a rotation system. When you harvest a batch of green onions or cilantro, for example, simply start a new cutting right after. That way, you always have a fresh supply on the way. It’s like having your own little farm right in your kitchen!
Make sure to always save the healthiest scraps to regrow. If you’ve had success with one celery base, next time use the same method with a similar, healthy base. By picking strong, healthy scraps, you set yourself up for even better results.
As your plants grow, harvest wisely. Don’t take too much at once, leaving enough of the plant intact will ensure it keeps growing.
Final Thoughts
Regrowing veggies from kitchen scraps is honestly one of the most satisfying and rewarding things you can do. Not just for your wallet but for your sense of accomplishment. Whether you’re snipping fresh green onions for a dish or harvesting baby potatoes from your own mini garden, it’s amazing to see scraps transform into something you can use again and again.
I hope this article gives you the confidence to try it out yourself. Remember, you don’t need fancy equipment or a huge garden to make this work. Just a little patience, some sunlight, and your kitchen scraps are all you need to start growing your own food at home.
So next time you’re chopping vegetables, think twice before tossing those scraps. With just a little care, you can bring them back to life and enjoy fresh, homegrown goodness. Happy gardening!