
There’s nothing quite like the taste of fresh, homegrown peas. They’re sweet, crisp, and packed with flavor—so much better than anything you’ll find in a store.
The good news? You don’t need a big garden to grow them! Peas do amazingly well in containers, making them a perfect choice for small spaces like balconies, patios, or even windowsills.
Why Grow Peas in Container?
Container gardening has a lot of perks. It lets you control the soil quality, reduce weed problems, and move your plants around to catch the best sunlight. Plus, if you struggle with pests in your garden, growing peas in a pot can help keep them at bay.
Peas are also one of the easiest vegetables to grow. They don’t need much attention, they grow fast, and they even improve the soil by adding nitrogen—so if you plant something else in the same soil later, it’ll get a little nutrient boost!
This guide will walk you through everything you need to know about growing peas in containers, from picking the right variety to harvesting delicious pods. Let’s get started!
Choosing the Right Pea Variety for Containers
Not all peas grow the same way, and picking the right variety can make a big difference when growing in containers. Some peas grow in compact, bushy plants, while others send out long vines that need support. If you’re short on space, choosing the right type will save you a lot of hassle.
Types of Peas
Before you plant, decide what kind of peas you want to grow. Here are the three main types:
- Snap Peas – These are sweet, crunchy, and can be eaten whole—pod and all. They’re great for snacking straight off the plant.
- Snow Peas – These have flat pods and are commonly used in stir-fries and salads. Like snap peas, you eat the whole pod.
- Shelling Peas (Garden Peas) – These are the classic peas you shell before eating. The pods aren’t edible, but the peas inside are plump and sweet.
Best Pea Varieties for Container Gardening
Since containers have limited space, look for compact or dwarf varieties that don’t need a lot of room to spread. Here are some great options:
- Sugar Ann – A dwarf snap pea that grows only about 2 feet tall and doesn’t need a trellis.
- Tom Thumb – As the name suggests, this variety stays small (around 8 inches tall) and is perfect for tiny pots or windowsills.
- Little Marvel – A bushy shelling pea that reaches about 18 inches tall and produces lots of sweet peas.
- Oregon Sugar Pod II – A snow pea variety that grows around 2–3 feet tall and does well in pots with a little support.
Bush vs. Vining Peas
- Bush peas (determinate) stay compact and are great for smaller containers. They don’t need much support, making them easier to manage.
- Vining peas (indeterminate) grow long tendrils and need a trellis or stakes to climb. They take up more space but often produce more peas over a longer period.
If you have a small space, go for bush peas. But if you’re okay with adding some stakes or a trellis, vining peas can be a fun and rewarding choice!
Now that you know which type of peas to grow, let’s move on to choosing the right container.
Selecting the Right Container
Peas are pretty easygoing plants, but choosing the right container will set them up for success. The size, material, and drainage all play a big role in how well your peas grow.
How Big Should the Container Be?
Peas don’t have deep roots, so you don’t need an enormous pot. However, they do like a bit of space to spread their roots. Here’s what to look for:
- Depth: At least 8–12 inches deep. This gives the roots enough room to grow.
- Width: Aim for a container that’s at least 12 inches wide if growing a few plants. If you’re planting multiple pea plants, a long planter or rectangular container works best.
- Spacing: Plant peas 2–3 inches apart, so make sure your container is big enough to fit the number of plants you want.
If you’re growing a bush variety, you can get away with smaller pots. But if you’re growing vining peas, a larger container with room for a trellis is best.
Best Container Materials
The material of your container can affect soil moisture and temperature. Here are the pros and cons of different options:
- Terracotta (Clay Pots) – Look nice and allow air to reach the roots, but they dry out quickly. Great if you tend to overwater, but you’ll need to water more often.
- Plastic Pots – Lightweight, hold moisture well, and don’t dry out as fast as clay. A budget-friendly option.
- Fabric Grow Bags – Excellent drainage and airflow, preventing root rot. Best for warmer climates where plastic or terracotta might overheat.
- Wooden Planters – A good middle ground; they hold moisture better than clay but still allow airflow. Just make sure they’re untreated wood.
Drainage is Key!
Peas don’t like soggy roots. Your container must have drainage holes at the bottom. If it doesn’t, drill a few holes before planting. If using a decorative pot without holes, place a smaller pot inside it or add a layer of gravel at the bottom to prevent waterlogging.
Trellis or No Trellis?
- Bush peas don’t need support and can grow happily in a regular pot.
- Vining peas need something to climb. A small trellis, bamboo stakes, or even a simple string system tied to a balcony railing will work.
Once you’ve got the perfect container, it’s time to prepare the best soil for your peas.
Preparing the Best Soil for Peas
Peas aren’t too fussy about soil, but giving them the right mix will help them grow strong and produce lots of sweet, crunchy pods. The key is to use well-draining, nutrient-rich soil that holds moisture without becoming soggy.
Best Soil Mix for Container Peas
A good soil mix should be light, airy, and full of nutrients. Here’s a simple mix that works great for peas:
- 60% potting soil – A high-quality, organic potting mix is best. Look for one with compost or aged manure for added nutrients.
- 20% compost – Peas don’t need a lot of fertilizer, but adding compost gives them a slow-release source of nutrients.
- 20% perlite or sand – This improves drainage and keeps the soil from getting too compacted.
Soil pH and Nutrients
- Peas prefer slightly acidic to neutral soil with a pH between 6.0 and 7.0. If you’re unsure, you can test your soil using a simple pH kit from a garden center.
- Since peas are nitrogen-fixing plants, they don’t need a lot of extra fertilizer. In fact, adding too much nitrogen can result in lots of leafy growth but fewer peas!
How to Prepare the Soil Before Planting
- Moisten the soil – Before planting, lightly water the soil so it’s damp but not soggy.
- Fill the container – Leave about an inch of space from the top to prevent water from spilling over.
- Loosen the soil – If your potting mix is compacted, fluff it up with your hands or a small trowel so the roots can spread easily.
Adding a Mulch Layer (Optional but Helpful!)
Mulching helps retain moisture and prevents weeds from growing in the pot. Once your peas sprout, adding a thin layer of:
- Straw – Helps keep moisture in and prevents soil from splashing onto the leaves.
- Shredded leaves – A great free option that also adds nutrients as it breaks down.
- Coconut coir – A sustainable mulch that keeps soil from drying out too fast.
Now that your soil is ready, it’s time for the most exciting part—planting your pea seeds!
Planting Pea Seeds in Containers
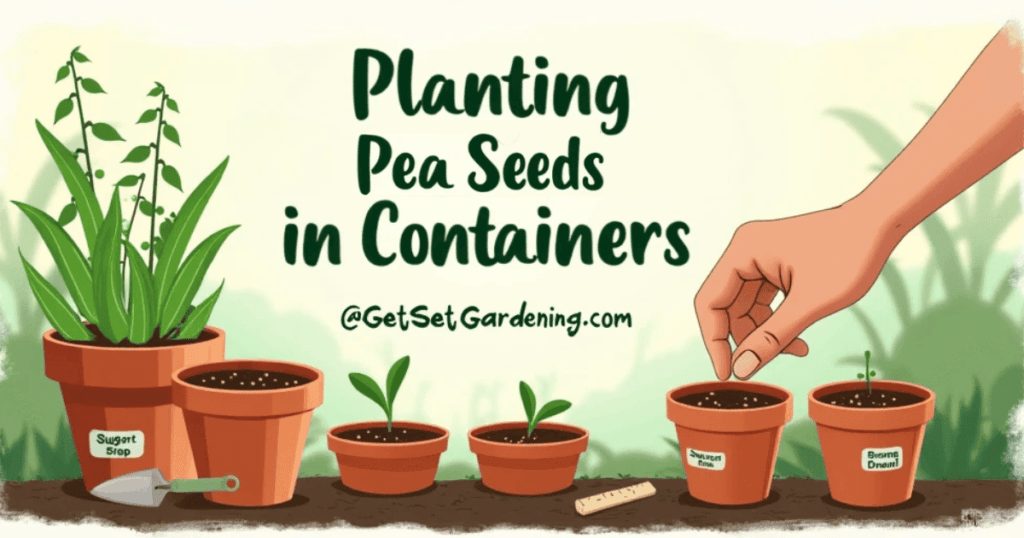
Now that you have the right container and soil ready, it’s time to plant your peas! Peas are one of the easiest vegetables to grow from seed, and they don’t like being transplanted, so it’s best to sow them directly into the container.
When to Plant Peas?
Peas love cool weather. The best time to plant them depends on your climate:
- Spring Planting: As soon as the soil is workable and temperatures are consistently above 45°F (7°C). In most regions, this is 4–6 weeks before the last frost.
- Fall Planting: If you live in a mild climate, you can plant peas in late summer or early fall for a second harvest before winter.
How to Plant Pea Seeds in Containers
Follow these simple steps to get your peas off to a great start:
- Soak the Seeds (Optional but Helpful!) – Soak pea seeds in water overnight to speed up germination. This step is especially useful if your soil is dry or if you’re planting in colder conditions.
- Make Planting Holes – Use your finger or a stick to poke holes about 1 inch deep in the soil.
- Spacing the Seeds – Plant each seed 2–3 inches apart. If you’re using a large container, plant rows about 6 inches apart.
- Cover and Water – Gently cover the seeds with soil and water lightly. Don’t overwater—just keep the soil moist.
- Label the Container – If you’re planting different pea varieties, add a label to keep track.
Germination and Early Growth
- Pea seeds usually sprout within 7–14 days, depending on the temperature.
- Keep the soil consistently moist but not waterlogged.
- If the weather is very cold, cover the container with a plastic sheet or cloche to trap warmth and speed up germination.
Thinning the Seedlings
Once your pea plants are about 2–3 inches tall, check if they’re overcrowded. If seedlings are too close together, carefully snip the weakest ones at the base rather than pulling them out (to avoid disturbing the roots).
Once your peas have sprouted, the next step is keeping them healthy and making sure they grow strong.
Caring for Pea Plants in Containers

Once your peas have sprouted, they need regular care to grow strong and produce a good harvest. Luckily, peas are low-maintenance plants, but paying attention to watering, support, and a little feeding will make a big difference.
Watering Peas in Containers
Peas like moist soil, but they don’t like sitting in water. Since containers dry out faster than garden beds, you’ll need to check them regularly.
- How often to water? Water deeply 2–3 times a week, or whenever the top inch of soil feels dry.
- Morning watering is best to give the plants moisture throughout the day.
- Avoid watering the leaves—wet leaves can lead to fungal diseases. Water at the base of the plants.
- On hot days, check the soil more often. If it dries out quickly, you may need to water daily.
Supporting Pea Plants
If you’re growing vining peas, they’ll need support to climb. Even bush varieties benefit from a little support to keep them upright.
Here are a few simple ways to support your pea plants:
- Small trellis – A bamboo or metal trellis placed in the container works well.
- Bamboo stakes and string – Stick a few bamboo stakes in the soil and tie twine between them for peas to grab onto.
- Wire fencing or mesh – Placing a small piece of wire fencing in the container gives peas a sturdy climbing surface.
- Balcony railing or wall hooks – If growing peas on a balcony, you can attach string to the railing or a wall and guide the peas up.
As the peas grow, gently encourage them to grab onto the support. They’ll start climbing on their own!
Fertilizing Pea Plants
Peas don’t need much fertilizer, but a little boost can help them grow strong and produce more pods.
- Use compost – Mixing compost into the soil at planting time is often enough for the whole season.
- Low-nitrogen fertilizer – If you need to fertilize, use a balanced organic fertilizer (like 5-10-10) once the plants start flowering. Too much nitrogen makes peas grow lots of leaves but fewer pods.
- Liquid seaweed or fish emulsion – A light feeding every 3–4 weeks can help if your peas look weak or yellow.
Mulching for Moisture and Weed Control
Mulching helps keep moisture in and prevents weeds. Add a thin layer of:
- Straw or dried grass clippings – Keeps the soil cool and moist.
- Shredded leaves – Provides nutrients as they break down.
- Coconut coir – A great natural mulch that holds moisture well.
Checking for Pests and Diseases
Peas don’t have many pest problems, but keep an eye out for:
- Aphids – Tiny green or black bugs that suck sap from leaves. Spray with soapy water or neem oil if you see them.
- Powdery mildew – A white, powdery fungus on leaves. Avoid watering the leaves and provide good air circulation.
- Slugs and snails – If growing peas on a balcony, this won’t be an issue. But in outdoor containers, you might need to hand-pick them or use organic slug bait..
Harvesting Peas from Your Container Garden
The best part of growing peas? Harvesting and enjoying fresh, sweet pods straight from the plant! Knowing when and how to pick them will keep your plants producing for as long as possible.
When to Harvest Peas?
The exact time depends on the variety you’re growing, but here’s a general guide:
- Snap Peas – Harvest when the pods are plump but still tender, usually about 6–8 weeks after planting. The peas inside should be developed but not too firm.
- Snow Peas – Pick these when the pods are flat and just before the peas inside start to swell. These are best when young and crisp.
- Shelling Peas (Garden Peas) – Wait until the pods are full and round but still bright green. If you wait too long, they become starchy instead of sweet.
A good rule of thumb is to taste-test a pod—if it’s sweet and crisp, it’s ready!
How to Harvest Peas Properly
- Use two hands – Hold the vine with one hand and gently pinch or snip the pod off with the other. This prevents damaging the plant.
- Check daily – Peas ripen quickly, especially in warm weather. Picking regularly encourages the plant to keep producing.
- Don’t wait too long – Overripe peas get tough and lose their sweetness. If you see pods turning yellow, they’ve gone too far.
How Long Do Peas Keep Producing?
Pea plants usually keep producing for 3–4 weeks, depending on the weather. Once the temperature gets too hot (above 80°F/27°C), production slows down. To extend the harvest:
- Pick often – The more you harvest, the more the plant will produce.
- Give them a little compost or organic fertilizer after the first harvest to encourage new growth.
- If they stop flowering, it’s the end of their cycle—but you can always plant a second round in fall if your climate allows!
Storing Freshly Harvested Peas
Peas taste best fresh, but if you have more than you can eat, here’s how to store them:
- Refrigeration: Store peas in an airtight container or plastic bag in the fridge. They stay fresh for 3–5 days.
- Freezing: Blanch peas in boiling water for 1–2 minutes, then cool them in ice water before freezing. This keeps them fresh for months!
- Drying (for seeds): If you want to save seeds for next year, let some pods dry completely on the vine. Then, store the dried peas in an envelope or jar in a cool, dry place.
What to Do After Harvesting Peas?
Once your pea plants have finished producing, you don’t have to toss them out right away. There are a few ways to make the most of your plants and prepare your container for the next growing season.
Should You Remove Pea Plants?
Pea plants naturally stop producing once temperatures get too hot (above 80°F/27°C) or too cold. When they stop flowering and no new pods appear, it’s time to remove them. But don’t just yank them out—there are ways to keep benefiting from your plants.
Ways to Reuse Pea Plants
✅ Leave the Roots in the Soil
Peas are part of the legume family, which means their roots fix nitrogen in the soil. Instead of pulling the whole plant out, cut the stems at soil level and leave the roots in place. They’ll break down and enrich the soil for your next crop.
✅ Compost the Plants
The vines, leaves, and stems make great compost. Just chop them into small pieces and add them to your compost bin or pile. They’ll break down and add nutrients to your garden.
✅ Grow a Follow-Up Crop
Since peas improve soil fertility, you can plant another crop in the same container right after harvesting. Great follow-up crops include:
- Leafy greens (lettuce, spinach, kale) – They love the nitrogen-rich soil left by peas.
- Carrots or radishes – These grow well in containers and don’t need a lot of nutrients.
- Bush beans – If it’s still warm, beans can take over the space where your peas were.
Preparing Your Container for the Next Planting
If you’re done growing for the season, here’s how to clean and prepare your container for future use:
1️⃣ Remove leftover plant debris – If you’re not replanting immediately, clear out any remaining stems and weeds.
2️⃣ Mix in fresh compost – If you plan to grow another crop, add a layer of compost to refresh the soil.
3️⃣ Let the soil rest – If you’re taking a break from planting, mix in some compost, cover the container with mulch, and store it in a shady spot.
4️⃣ Wash and disinfect the container – If your plants had any diseases, scrub the container with a mix of water and white vinegar before reusing it.
By taking these steps, your container will be ready for the next growing season—whether you plant another round of peas or try something new!
Common Problems and How to Fix Them
Growing peas in containers is generally easy, but like any plant, they can run into a few problems. The good news? Most issues have simple solutions. Here’s what to watch for and how to fix them.
1. Pea Plants Aren’t Germinating
👉 Possible Causes:
- Soil is too cold (below 40°F/4°C)
- Seeds were planted too deep
- Soil is too dry
✅ How to Fix It:
- Wait until the soil temperature is at least 50°F (10°C) before planting.
- Sow seeds about 1 inch (2.5 cm) deep—any deeper, and they may struggle to sprout.
- Keep the soil consistently moist but not soggy.
2. Yellowing Leaves
👉 Possible Causes:
- Overwatering or poor drainage
- Lack of nutrients
- Hot temperatures
✅ How to Fix It:
- Make sure your container has drainage holes and avoid watering too often. Stick your finger into the soil—if the top inch is dry, it’s time to water.
- If plants look pale, give them a light feeding of compost or diluted organic fertilizer.
- Peas prefer cool weather—if it’s too hot, provide shade during the hottest part of the day.
3. Pea Plants Are Tall but Have No Flowers
👉 Possible Causes:
- Too much nitrogen in the soil
- Lack of sunlight
✅ How to Fix It:
- Avoid using too much nitrogen-rich fertilizer—it encourages leafy growth but prevents flowers and pods from forming.
- Peas need at least 6 hours of sunlight per day. Move your container to a sunnier spot if necessary.
4. Flowers Are Falling Off but No Peas Are Forming
👉 Possible Causes:
- Poor pollination
- Hot weather
✅ How to Fix It:
- Peas are self-pollinating, but if airflow is limited, gently shake the plants to help spread pollen.
- If temperatures are too high (above 80°F/27°C), wait for cooler weather—pea plants will start producing again once it cools down.
5. Pea Pods Are Small and Wrinkled
👉 Possible Causes:
- Inconsistent watering
- Peas left on the plant too long
✅ How to Fix It:
- Keep the soil evenly moist—drought stress can cause small, tough pods.
- Harvest peas as soon as they’re plump and tender—waiting too long can make them dry and starchy.
6. Pests on Pea Plants
🐛 Aphids – These tiny green bugs suck the sap from leaves, making plants weak.
✅ Fix: Spray plants with a mixture of water and a little dish soap, or introduce ladybugs (which eat aphids).
🐛 Pea Weevils – These beetles chew holes in leaves and pods.
✅ Fix: Cover young plants with floating row covers to keep them away.
🐛 Slugs & Snails – They munch on tender leaves and stems.
✅ Fix: Place crushed eggshells or diatomaceous earth around the container to deter them.
Final Tip:
Most problems with peas can be prevented by planting at the right time, providing good airflow, and keeping the soil healthy. Keep an eye on your plants, and you’ll enjoy a great harvest!
Final Thoughts
Growing peas in containers is a rewarding experience that can bring fresh, homegrown produce right to your doorstep, even if you have limited space.
The beauty of growing peas in containers is that it’s not just about the harvest—it’s about the journey. From the joy of watching tiny seeds sprout into thriving plants to the satisfaction of harvesting your own produce, container gardening offers a connection to nature that can be incredibly fulfilling.
So, grab your seeds, choose your containers, and start planting.🌱😊