Sweet potatoes might seem like a crop that only farmers can grow, but you can grow them right in your backyard or even in containers. They’re easier to grow than you might think, and nothing beats the taste of homegrown sweet potatoes. Plus, you’ll save money – organic sweet potatoes cost $2-3 per pound at the store, but you can grow dozens from a single potato.
What You Need to Know Before Starting
Sweet potatoes aren’t actually potatoes. They’re root vegetables that belong to the morning glory family. Regular potatoes grow from eyes on the potato itself, but sweet potatoes grow from slips – small shoots that sprout from the sweet potato.
These plants love warm weather. They need about 90 to 120 days of warm temperatures (above 70°F during the day) to produce good tubers. If you live in a colder climate, don’t worry. You can still grow them, but you’ll need to plan around your growing season. Northern gardeners often use black plastic mulch to warm the soil and extend their season.
Quick climate check:
- Zones 8-11: You can grow sweet potatoes easily with a long season
- Zones 5-7: You’ll need to start slips indoors and might need row covers
- Zones 3-4: Choose short-season varieties and use season extenders
Getting Your Hands on Sweet Potato Slips

You’ve got three ways to get slips:
Buy them from a nursery – This is the easiest option. Garden centers sell slips in the spring, usually for $2 to $4 each. You’ll typically find them in bundles of 12-25.
Order them online – Many companies ship slips in spring. They arrive looking a bit sad and wilted, but they perk up once planted. Expect to pay $15-25 for a bundle of 25, plus shipping.
Grow your own – This takes 6-8 weeks but costs almost nothing. One sweet potato can produce 15-20 slips.
How to Grow Your Own Slips
Starting your own slips saves money and lets you grow varieties you can’t find locally. Start this process about 8 weeks before your last frost date.
- Get a sweet potato from the grocery store (organic works best since they’re not treated to prevent sprouting)
- Cut it in half lengthwise or crosswise – both methods work
- Place each half in a shallow dish with the cut side down
- Add water until it covers the bottom half of the potato
- Put it somewhere warm – a sunny windowsill or on top of the refrigerator works great (aim for 75-80°F)
- Change the water every few days to prevent rot
- Wait – In about 2-3 weeks, you’ll see shoots growing from the top
Once the shoots are about 4-5 inches tall with roots, twist them off gently at the base. These are your slips. Put them in a glass of water for a few days until the roots get stronger – about 1-2 inches long is perfect.
Pro tip: Some sweet potatoes sprout faster than others. Start with 2-3 potatoes to make sure you get enough slips.
Preparing Your Garden Bed
Sweet potatoes need loose, well-draining soil. They hate sitting in water, and hard soil makes it tough for the tubers to grow properly. Think of it this way – the potatoes need to push through the soil as they grow, so make it easy for them.
Choose your spot:
- Pick somewhere that gets at least 6-8 hours of direct sun
- Make sure water doesn’t pool there after rain
- Keep it away from trees that might shade the area later
- Avoid spots where you grew tomatoes, peppers, or potatoes last year
Prepare the soil:
- Loosen the soil about 8-10 inches deep using a garden fork or tiller
- Mix in 2-4 inches of compost or aged manure
- If your soil is heavy clay, add coarse sand (not fine sand) to improve drainage
- Create raised rows about 8-10 inches high – this helps with drainage and gives the tubers room to grow
Test your drainage: Dig a hole 12 inches deep and fill it with water. If water is still there after 6 hours, you need better drainage.
Don’t add too much nitrogen-rich fertilizer. It’ll give you lots of leaves but small potatoes. A soil test can tell you exactly what your soil needs, but most gardens do fine with just compost.
Planting Your Sweet Potato Slips
Timing is everything. Wait until the soil temperature reaches at least 60°F – ideally 65-70°F. This is usually 2-3 weeks after your last frost. You can check soil temperature with a simple soil thermometer pushed 4 inches into the ground.
Steps for planting:
- Dig holes about 4-5 inches deep and 12-18 inches apart (rows should be 3 feet apart)
- Remove lower leaves from the slip, keeping just the top cluster
- Place each slip in a hole, burying it up to the top leaves
- Press the soil gently around the slip to remove air pockets
- Water thoroughly, but don’t flood them – the soil should be moist, not muddy
The slips might look droopy for a few days. That’s normal – they’re just adjusting. Keep the soil moist (not wet), and they’ll perk up within a week. If a slip doesn’t make it, plant a replacement right away.
First week care:
- Water lightly every day if it doesn’t rain
- Provide shade during the hottest part of the day if needed
- Watch for cutworms – they can chop down young plants at soil level
Growing in Containers
No garden? No problem. Sweet potatoes grow well in containers, and some gardeners prefer this method because it makes harvesting easier.
What you need:
- A container at least 20 gallons (bigger is better – try a half whiskey barrel)
- Drainage holes in the bottom (drill extras if needed)
- Good quality potting mix (not garden soil)
- A sunny spot – at least 6 hours of direct sun
Container planting steps:
- Fill the container with potting mix, leaving 2 inches at the top
- Plant 1-2 slips per container using the same method as garden planting
- Water until it runs out of the drainage holes
- Place the container where it won’t need to be moved
The vines will spill over the sides, which looks pretty nice on a patio or deck. You can train them up a trellis if you want to save space.
Container tips:
- Dark containers warm up faster, but might get too hot in southern climates
- Move containers against a south-facing wall for extra warmth
- Container plants need more frequent watering than garden plants
Caring for Your Sweet Potatoes

Once your plants get going, they’re pretty low maintenance. The vines will start spreading after about a month, and that’s when you know things are going well.
Watering:
- Water deeply once a week during dry spells (about 1 inch of water)
- Use drip irrigation or soaker hoses to avoid wetting leaves
- Cut back on watering 3-4 weeks before harvest to prevent cracking
- Too much water late in the season can cause the potatoes to split or rot
Feeding:
- Side-dress with compost once during the growing season (about 6 weeks after planting)
- If leaves turn yellow, apply a balanced organic fertilizer (5-5-5)
- Avoid high-nitrogen fertilizers after planting – you want roots, not leaves
Weeding:
- Keep weeds under control for the first month by hand-pulling
- Once the vines spread, they’ll shade out most weeds
- Mulch between rows with straw or grass clippings to prevent weeds
Dealing with the vines:
- The vines can spread 3-4 feet in all directions
- Lift and move vines periodically to prevent them from rooting at the joints (this takes energy away from potato production)
- You can eat the leaves – they’re nutritious! Harvest young leaves and cook them like spinach
- Trim vines if they’re taking over other plants
Common Problems and Solutions

Most sweet potato problems are preventable with good garden practices.
Wireworms – These pests bore holes in your potatoes.
- Prevention: Crop rotation helps prevent them
- Solution: Till the soil in the fall to expose them to birds and cold
Black rot – Dark, sunken spots on the potatoes.
- Prevention: Buy disease-free slips and rotate crops (wait 3-4 years before planting in the same spot)
- Solution: Remove affected plants immediately
Cracking – Split potatoes are still edible, but won’t store well.
- Cause: Usually from uneven watering (dry spell followed by heavy rain)
- Prevention: Keep moisture levels consistent with mulch and regular watering
Small potatoes – Disappointing harvest size.
- Common causes: Harvesting too early, poor soil, too much nitrogen, not enough sun
- Solution: Be patient, improve your soil, and reduce nitrogen next year
Deer and voles – They love sweet potato leaves and roots.
- Prevention: Fencing for deer, hardware cloth barriers for voles
- Solution: Plant extra to share or use repellents
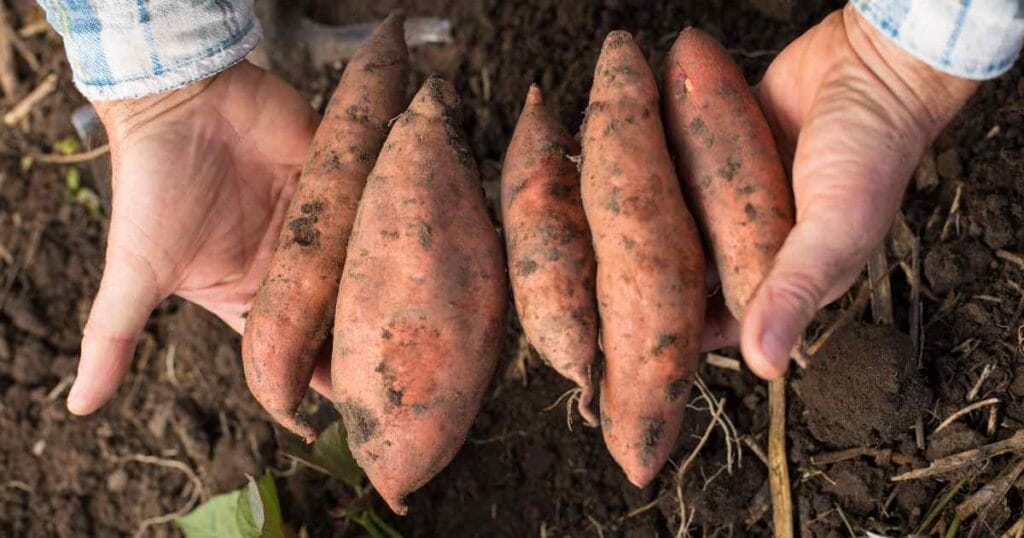
When and How to Harvest

Sweet potatoes are ready when the leaves start yellowing, usually 90-120 days after planting. But here’s the thing – they can stay in the ground longer if the weather’s still warm. They’ll just get bigger. Some gardeners dig up one plant to check the size before harvesting everything.
Harvest before the first frost. Cold damages sweet potatoes – even a light frost can ruin the ones near the surface.
Perfect harvest conditions:
- Dry soil (wait 3-4 days after rain)
- Warm, sunny day
- Morning harvest gives you all day to cure them
How to harvest:
- Cut back vines first to see what you’re doing
- Loosen the soil around the plants with a garden fork, starting 12 inches from the center
- Dig from the side to avoid stabbing the potatoes
- Work your hands through the soil to find all the potatoes – they can be 6-8 inches deep
- Lift carefully – the skins are thin and damage easily when fresh
- Brush off dirt gently, but don’t wash them yet
- Handle like eggs – any cuts or bruises will lead to rot in storage
Curing and Storing Your Sweet Potatoes

Fresh-dug sweet potatoes aren’t very sweet. They need to cure to develop their sweetness – the starches convert to sugars during this process.
Curing process:
- Place potatoes in a single layer (don’t pile them up)
- Keep them in a warm (80-85°F), humid (85-90% humidity) place for 7-10 days
- A spare bathroom with a space heater and a pan of water works well
- Or try a large cardboard box with ventilation holes near a heat source
- After curing, move to a cool (55-60°F), dark place with good ventilation
Storage tips:
- Wrap each potato in newspaper for longer storage
- Check monthly and remove any that show soft spots
- Don’t store near apples – they release gas that can affect flavor
- Never refrigerate raw sweet potatoes – cold damages them
Properly cured and stored sweet potatoes last 6-10 months. That’s way longer than regular potatoes. The flavor actually improves after a month or two of storage.
Tips for Success
- Start small your first year – try 5-10 plants to learn the process
- Keep records of planting and harvest dates, varieties, and yields
- Save a few good potatoes to make slips next year (choose your best-shaped ones)
- Mulch around plants to keep soil moist and warm – black plastic works great in cool climates
- Try different varieties – some are better for your climate:
- ‘Georgia Jet’ – 90 days, good for short seasons
- ‘Beauregard’ – 100 days, disease resistant
- ‘Centennial’ – 100 days, stores well
- ‘Purple sweet potatoes’ – 120 days, fun color and extra nutrition
Making It Worth Your While
One plant typically produces 3-6 sweet potatoes, depending on variety and growing conditions. With 10 plants, you’re looking at 30-60 potatoes. That’s enough to last most families several months and saves you $50-100 at the grocery store.
And here’s something store-bought can’t match – you can harvest some young potatoes early in the season when they’re small and tender. Dig carefully around the base of a plant and take one or two baby potatoes. The plant will keep producing more.
Beyond basic sweet potatoes:
- Grow the leaves as a summer green vegetable
- Dehydrate slices for healthy chips
- Freeze mashed sweet potatoes for quick sides
- Share slips with neighbors to spread the gardening joy
Sweet potatoes are forgiving plants. Even if you make mistakes, you’ll probably still get some harvest. Each year, you’ll get better at reading your plants and understanding what they need. My first year, I got tiny potatoes because I harvested too early. Now I get 5-pounders regularly.
So go ahead and give it a try. Start with a sweet potato from your kitchen, grow some slips, and see what happens. By fall, you might just have a pile of homegrown sweet potatoes to enjoy all winter long. And once you taste the difference between homegrown and store-bought, you’ll be hooked.