
Growing corn in your backyard isn’t as hard as you might think. Sure, farmers grow it in massive fields, but you can grow sweet corn in your garden and enjoy fresh ears right off the stalk. This guide walks you through everything you need to know, from picking the right variety to harvesting those golden ears.
Why Grow Corn at Home?
Fresh corn tastes completely different from store-bought corn. The sugars in corn start converting to starch the moment you pick it, so the fresher it is, the sweeter it tastes. When you grow your own, you can walk outside, pick an ear, and have it on your plate within minutes.
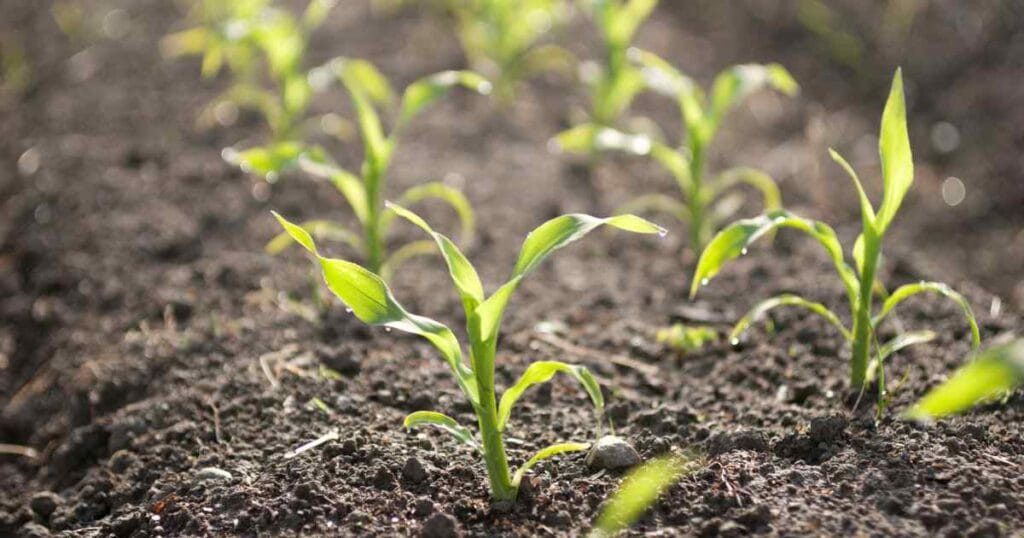
Plus, there’s something satisfying about watching those tall stalks grow in your garden. Kids love it too – corn grows fast enough that they can see real progress week by week. In good conditions, corn can grow 2-3 inches per day during its peak growth period. That’s fast enough to notice the difference from morning to evening.
Understanding Corn Basics
Corn is a warm-season crop that needs plenty of sun and heat. It’s actually a type of grass, which explains why it grows so tall and straight. Each plant typically produces one to three ears, depending on the variety and growing conditions.
Here’s what makes corn unique:
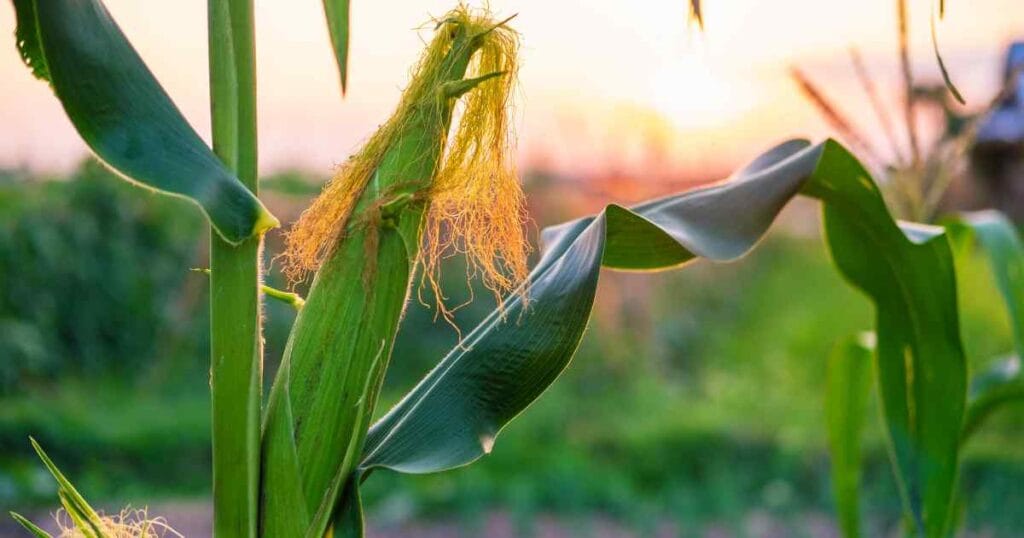
- Wind pollination: Corn doesn’t need bees. The wind carries pollen from the tassels (male flowers) at the top to the silks (female flowers) on the ears. Each silk connects to a single kernel, so every silk needs pollen to develop a full ear
- Heavy feeder: Corn needs lots of nutrients, especially nitrogen. It’s one of the hungriest plants in your garden.
- Space requirements: You need to plant corn in blocks, not single rows, for proper pollination. This is probably the biggest difference from other vegetables.
The Science Behind Block Planting
When you plant corn in a single row, the wind blows most of the pollen away from the plants. But when you plant in blocks, the pollen has a better chance of landing on the silks of nearby plants. Think of it like this: if you’re trying to catch something falling from above, would you rather have one bucket or sixteen buckets arranged in a square?
Choosing the Right Corn Variety

You’ll find three main types of corn for home gardens:
Sweet Corn
This is what most people grow. It comes in three categories based on sugar content and genetics:
- Standard (su): Traditional corn flavor, needs to be eaten quickly after picking. Seeds germinate well in cooler soil. Examples: ‘Silver Queen’, ‘Golden Bantam’
- Sugar enhanced (se): Sweeter than standard, stays fresh a bit longer. Good balance of sweetness and corn flavor. Examples: ‘Bodacious’, ‘Incredible’, ‘Temptation’
- Supersweet (sh2): Very sweet, stays fresh longer, but needs warmer soil to germinate (at least 65°F). It can be tricky for beginners. Examples: ‘How Sweet It Is’, ‘Honey Select’
Ornamental Corn
Grown for decoration, not for eating. These varieties produce colorful kernels in reds, blues, and purples. They take longer to mature (100-120 days) and need to dry on the stalk. Popular varieties include ‘Earth Tones Dent’ and ‘Glass Gem’.
Popcorn
Yes, you can grow your own popcorn. It takes longer to mature than sweet corn (90-120 days) and needs to dry completely before you can pop it. The kernels are smaller and harder than sweet corn. Try ‘Dakota Black’ or ‘Robust 997’.
For beginners, I recommend starting with a sugar-enhanced variety like ‘Bodacious’ or ‘Incredible’. They’re forgiving, germinate reliably, and taste great. Save the supersweet varieties for after you’ve had a successful season or two.
Understanding Maturity Dates
Corn varieties are labeled with days to maturity (like “75 days”). This means 75 days from germination to harvest, not from planting. Add about a week for germination time. So a 75-day variety actually takes about 82 days from planting to eating.
When to Plant Corn

Corn hates cold soil. Seeds rot instead of germinating if the soil is too cold. Wait until:
- Soil temperature reaches at least 60°F (better at 65-70°F)
- About 2-3 weeks after your last frost date
- Nighttime temperatures stay above 50°F consistently
To check soil temperature, stick a thermometer 2-3 inches deep in the morning. Do this for several days to get an average.
In most areas, this means planting between late April and early June. You can plant successive crops every two weeks until about 12 weeks before your first fall frost. This succession planting gives you fresh corn over a longer period instead of having it all ripen at once.
Preparing Your Garden Space
Location Requirements
- Full sun: At least 6-8 hours of direct sunlight. Corn won’t produce well in shade
- Protection from wind: Strong winds can blow over corn stalks, especially when they’re heavy with ears
- Good drainage: Corn doesn’t like wet feet. If water puddles after rain, find a different spot
Soil Preparation
Corn grows best in:
- pH: 6.0 to 6.8 (slightly acidic to neutral)
- Rich, loose soil: Work in 2-3 inches of compost or aged manure before planting
- Well-draining soil: If you have clay, add organic matter to improve drainage. Sandy soil needs organic matter to hold moisture.
Test your soil if you can. Home test kits cost about $15 and tell you the pH and major nutrients. Corn needs lots of nitrogen, so knowing your starting point helps. If your soil test shows low nitrogen, add blood meal or composted manure before planting.
Space Planning
Here’s the tricky part – corn needs to be planted in blocks, not rows. This ensures good pollination.
Minimum block size: 4 rows by 4 rows (16 plants total).
Better: Larger blocks produce better pollination. A 6×6 block works great
Plan for:
- 8-12 inches between plants (closer for smaller varieties)
- 30-36 inches between rows (or 24 inches if space is tight)
- Each plant needs about 1 square foot of space
So a minimum block (4×4) needs about 10 feet by 10 feet of garden space. Measure it out before you plant.
How to Plant Corn Seeds
Direct Seeding (Recommended)
Corn doesn’t like being transplanted because it has a taproot that’s easy to damage. Plant seeds directly in the garden:
- Make furrows 1-2 inches deep using a hoe or your finger
- Drop seeds 4-6 inches apart (you’ll thin later to final spacing)
- Cover with soil and pat down gently. Good soil contact helps germination
- Water thoroughly but gently. Use a sprinkler or gentle spray to avoid washing seeds away
- Mark your rows with stakes and string so you know where you planted
Seeds should germinate in 7-10 days in warm soil, or up to 3 weeks if soil is cooler.
Starting Indoors (If Needed)
If you have a short growing season (less than 90 frost-free days):
- Use biodegradable pots that you can plant directly
- Plant 3-4 weeks before the last frost
- Plant 2 seeds per pot, about 1 inch deep
- Keep at 65-75°F for best germination
- Transplant very carefully to avoid root damage. Plant the entire pot
But honestly? Direct seeding works better if you can manage it.
The Pre-Sprouting Trick
In cold climates, try pre-sprouting seeds indoors. Wrap seeds in a damp paper towel, put them in a plastic bag, and keep them at 70°F. Check daily when you see white roots emerging (2-4 days), plant immediately. This gives you a head start without transplanting.
Caring for Your Corn

Watering
Corn needs consistent moisture, especially during two critical periods:
- 1-1.5 inches per week, including rainfall. Use a rain gauge to track
- Deep watering encourages deep roots. Water once or twice weekly rather than daily sprinkles
- Critical times: When tassels appear and when silks emerge. Stress during these times means poor pollination
- Use drip irrigation or soaker hoses to avoid wetting leaves (reduces disease)
If leaves roll up during the day, your corn needs water. But don’t panic if they roll slightly on very hot afternoons – that’s normal.
Fertilizing
Corn is hungry. Really hungry. Feed it well:
- At planting: Work compost or balanced fertilizer (like 10-10-10) into the soil
- When 6 inches tall: Side-dress with nitrogen-rich fertilizer
- When knee-high: Another round of nitrogen (this is when corn really takes off)
- When tassels form: Final feeding helps ears develop
Use about 1/4 pound of 10-10-10 fertilizer per 10 feet of row for each feeding. Sprinkle it 6 inches from the plants and water in. Or use fish emulsion every 2 weeks if you prefer organic options.
Thinning
When plants are 4-6 inches tall, thin to final spacing:
- Keep the strongest, healthiest-looking plants
- Leave 8-12 inches between plants
- Don’t pull – cut at soil level with scissors to avoid disturbing neighboring roots
- Thinning feels wasteful, but crowded corn produces poorly
Mulching
Apply 2-3 inches of mulch around plants when they’re about a foot tall:
- Helps retain moisture (crucial during silk stage)
- Suppresses weeds that compete for nutrients
- Keeps soil cool in hot weather
- Use straw, grass clippings (from untreated lawns), or shredded leaves
Hilling
When corn is knee-high, mound soil 2-3 inches high around the base of each stalk. This:
- Helps anchor plants against the wind
- Encourages additional root growth
- Reduces lodging (falling over)
Common Corn Problems and Solutions
Pests
Corn earworms: The most common pest. Moths lay eggs on fresh silks, and larvae eat kernels.
- Look for eggs on fresh silks (tiny white dots)
- Apply mineral oil to silk tips 3-4 days after silks appear (use an eyedropper, about 20 drops per ear)
- Use Bt spray if needed (organic option)
- Plant early to avoid peak moth season
Corn borers: Tunnel into stalks, weakening plants
- Look for small holes and sawdust-like frass
- Remove and destroy affected plants
- Clean up all garden debris in fall (borers overwinter in stalks)
- Choose resistant varieties if borers are common in your area
Raccoons and squirrels: Love ripe corn
- Harvest promptly when ready
- Try electric fencing if damage is severe (2 wires at 6 and 12 inches)
- Motion-activated sprinklers work for some gardeners
- Some people swear by leaving a radio playing in the garden
Diseases
Common smut: Gray or black growths on ears, leaves, or stalks
- Remove and destroy affected parts immediately (actually edible when young, considered a delicacy in Mexico)
- Don’t compost infected material
- Rotate crops next year
- Avoid injuring plants when cultivating
Leaf blight: Brown spots on leaves that expand and merge
- Provide good air circulation (proper spacing helps)
- Water at soil level, not overhead
- Remove affected leaves and destroy
- Choose resistant varieties next year
Stewart’s wilt: Leaves turn yellow and brown, spread by flea beetles
- Control flea beetles early in the season
- Remove affected plants
- No cure once infected
Growing Problems
Poor pollination: Results in missing kernels, partial ears
- Plant in blocks, not rows (can’t stress this enough)
- Hand-pollinate if needed: shake tassels over silks, or cut a tassel and dust it over silks
- Avoid planting when pollination will occur during expected hot, dry weather
Lodging (falling over):
- Hill soil around base when plants are knee-high
- Plant in protected areas
- Choose shorter varieties for windy sites
- Stake plants if necessary (though this is labor-intensive)
Stunted growth: Usually nitrogen deficiency
- Leaves turn yellow from the bottom up
- Apply nitrogen fertilizer immediately
- Prevent with adequate fertilization
How to Tell When Corn Is Ready
Sweet corn is ready about 20 days after silks appear, but this varies with temperature. Look for:
- Brown, dry silks (but not completely dried out)
- Full, rounded ear that feels firm when you squeeze gently through the husk
- Kernels that squirt milky juice when punctured with a fingernail
To check ripeness: Pull back a small section of husk at the tip and press a kernel with your fingernail.
- Clear juice: Too early, wait a few days
- Milky juice: Perfect! Harvest now
- No juice or pasty: Overripe, still edible but starchier
The harvest window for perfect corn is only about 3-5 days, so check daily once the silks brown.
Harvesting Your Corn
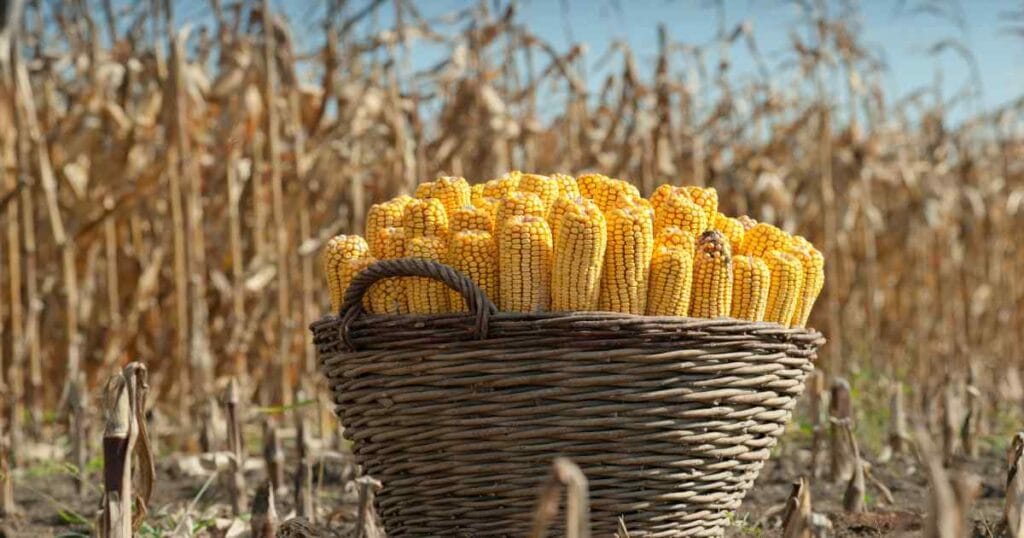
Once corn is ready:
- Harvest in the morning when sugar content is highest and corn is cool
- Grab the ear firmly and pull down while twisting. It should snap off cleanly
- Cook or refrigerate immediately for best flavor. Have your water boiling!
Corn is best eaten the day you pick it. The old saying goes: “Get the water boiling before you pick the corn.” That’s only a slight exaggeration.
What About Second Ears?
Many varieties produce a second, smaller ear below the main one. These “sucker ears” are usually ready 4-7 days after the main ear. They’re smaller but perfectly good to eat.
Storing Fresh Corn
If you can’t eat it right away:
- Leave husks on until ready to use (they help retain moisture)
- Refrigerate immediately in plastic bags
- Use within 2-3 days for best quality (sugar converts to starch even in the fridge)
For longer storage:
- Blanch whole ears for 4-6 minutes in boiling water
- Cool in ice water for the same time you blanched
- Cut kernels off the cob or freeze whole ears
- Freeze in airtight containers or freezer bags (remove as much air as possible)
- Use within 8-10 months for best quality
You can also pickle corn or make relish for shelf-stable storage.
Tips for Success
- Start small – A 10×10 foot plot gives you room to learn without being overwhelmed.
- Keep records – Note planting dates, varieties, weather, and what worked. You’ll forget by next year.
- Be patient with pollination – It happens fast once it starts (usually over 5-7 days)
- Don’t plant different types together – They can cross-pollinate. Keep sweet corn 250 feet from popcorn or field corn.
- Succession plant – Plant new blocks every 2 weeks for continuous harvest
- Watch the weather – Hot, dry weather during pollination reduces kernel set
- Harvest on time – Set phone reminders if needed. Overripe corn is disappointing
Common Mistakes to Avoid
- Planting too early in cold soil (seeds rot)
- Single rows instead of blocks (poor pollination)
- Overcrowding plants (small ears or no ears)
- Letting soil dry out during silking (poor kernel development)
- Harvesting too late when kernels are starchy
- Planting supersweet varieties next to other types (cross-pollination ruins both)
- Ignoring fertility needs (corn won’t tell you it’s hungry until it’s too late)
Final Thoughts
Growing corn takes some space and patience, but it’s worth it. That first bite of truly fresh, sweet corn will convince you. Start with a small block, learn what works in your garden, and expand from there.
Remember, even experienced gardeners have years where the corn doesn’t cooperate. Weather, pests, or timing issues happen to everyone. But when you get it right, and you’re eating corn that was on the stalk an hour ago, you’ll understand why people keep growing it year after year.