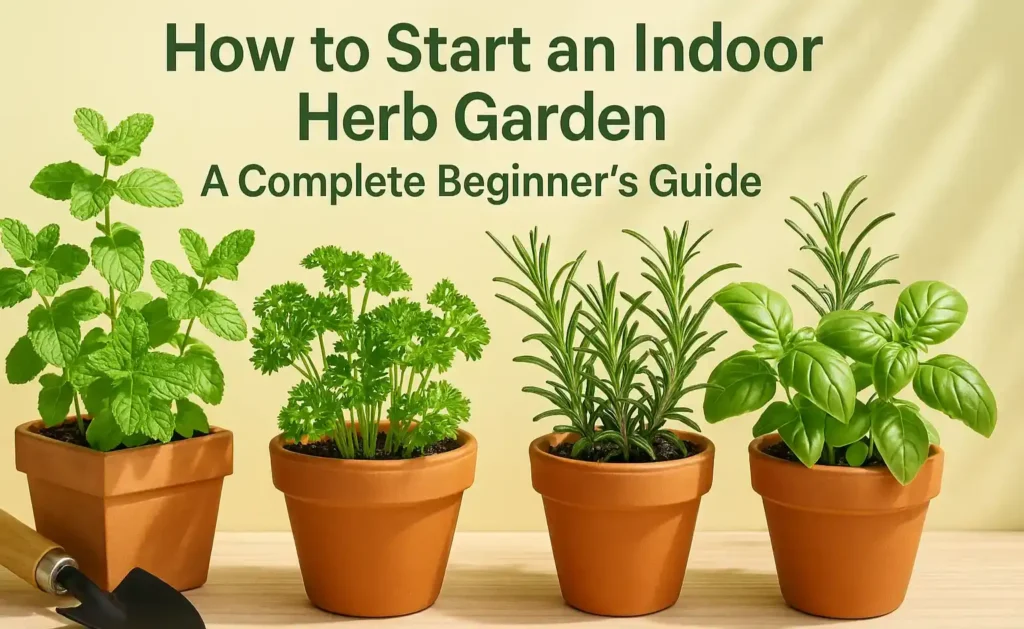

Imagine stepping into your kitchen, picking a few fresh basil leaves, snipping some rosemary, or plucking a handful of mint—all grown right in your own home. There’s something incredibly satisfying about using fresh herbs in your cooking, knowing they’re free from chemicals and full of flavor.
The best part? Herbs are easy to grow, even if you don’t have a big garden. A few pots on a sunny windowsill or a small balcony are enough to keep a steady supply of fresh flavors all year round.
In this guide, we’ll walk you through 12 essential herbs that every home cook should grow.
Benefits of Growing Your Own Herbs

Growing your own herbs isn’t just about having fresh ingredients at your fingertips—it’s a game changer for your health, your cooking, and even the environment.
Health Benefits
Fresh herbs do more than just add flavor to your meals—they’re packed with vitamins, minerals, and antioxidants that support good health.
- Rich in Nutrients – Herbs like parsley, cilantro, and basil are full of vitamins A, C, and K, which help boost your immune system and keep your body strong.
- Supports Digestion – Mint, fennel, and thyme can help soothe digestion and reduce bloating. Many herbs have natural anti-inflammatory properties.
- No Chemicals – Store-bought herbs are often sprayed with pesticides. When you grow your own, you know exactly what goes into them—no chemicals, just pure goodness.
Culinary Benefits
There’s a reason why top chefs love using fresh herbs—they make food taste better!
- Better Flavor – Fresh basil, oregano, or rosemary straight from the plant have a stronger, fresher taste than dried or store-bought herbs.
- Always Available – No more running to the store when you need a handful of cilantro or a sprig of rosemary. Your herbs are right there, ready to be picked.
- Saves Money – Buying fresh herbs from the grocery store can be expensive, and they often go bad quickly. When you grow your own, you save money and only take what you need.
Environmental Benefits
Growing herbs at home isn’t just good for you—it’s good for the planet too!
- Less Food Waste – No more buying a whole bunch of parsley just to use a little. You pick what you need, and the plant keeps growing.
- Fewer Plastic Packages – Store-bought herbs often come in plastic bags or containers. Growing your own reduces plastic waste and helps the environment.
- Supports Pollinators – Herbs like basil, thyme, and mint attract bees and butterflies, which are essential for a healthy ecosystem.
Getting Started: Setting Up Your Kitchen Herb Garden

Starting your own herb garden might sound like a big task, but trust me—it’s easier than you think! Let’s go step by step to get your herb garden up and running.
Choosing the Right Location
Herbs are pretty low-maintenance, but they do have one big requirement—sunlight! Most herbs need at least 6 hours of sunlight per day to grow well. Here’s how to pick the best spot:
- Windowsill Gardens – A south-facing window is ideal, but east- or west-facing windows can also work. If your home doesn’t get much sunlight, consider using grow lights.
- Balcony or Patio Gardens – If you have outdoor space, place your herb pots where they’ll get plenty of sun but also have some protection from strong winds.
- Backyard or Raised Beds – If you’re planting directly in the ground, choose a sunny spot with well-draining soil. Avoid areas with too much shade.
Picking the Right Containers
Herbs don’t need fancy pots to grow, but choosing the right containers can make a big difference. Here’s what to consider:
- Drainage is Key – Always use pots with drainage holes at the bottom. Herbs don’t like sitting in soggy soil.
- Size Matters – Most herbs do well in pots that are at least 6-8 inches deep, but larger plants like rosemary and mint need bigger containers.
- Get Creative – You don’t have to buy expensive planters! You can grow herbs in mason jars (with pebbles for drainage), old teapots, or even repurposed wooden boxes.
Choosing the Right Soil
Herbs aren’t too picky, but they do need the right soil to thrive.
- Use Well-Draining Soil – A good quality potting mix is best for herbs in containers. Avoid using regular garden soil, which can be too heavy.
- Add Compost – Mixing in a little compost or organic fertilizer helps give your herbs a nutrient boost.
- Check Moisture Levels – Herbs like well-drained soil, so make sure the potting mix isn’t too dense or compacted.
Watering and Drainage Tips
Watering your herbs correctly is one of the most important parts of keeping them healthy. Here’s what you need to know:
- Don’t Overwater – Most herbs prefer slightly dry soil. Water when the top inch of soil feels dry—don’t let the roots sit in water.
- Morning is Best – Water your herbs in the morning so they have all day to absorb moisture. Avoid watering at night, as this can lead to mold or root rot.
- Use a Tray for Indoor Plants – If you’re growing herbs indoors, place a tray under the pots to catch any extra water and prevent messes.
Now that you know how to set up your herb garden, you’re ready for the fun part—choosing which herbs to grow!
12 Must-Have Herbs for Your Kitchen Garden

Whether you love cooking Italian, Indian, or Mediterranean dishes, these 12 herbs will add fresh flavor to your meals. Plus, they’re easy to grow, even for beginners!
Let’s go through each herb, how to grow it, and tips to keep it thriving.
1. Basil (Ocimum basilicum)
Basil is a must-have herb for anyone who loves Italian or Thai food. It adds a fresh, slightly sweet flavor to dishes and is perfect for making pesto, adding to pasta, or garnishing salads.
How to Grow
- Sunlight: Needs 6-8 hours of direct sunlight daily.
- Soil: Well-draining, nutrient-rich soil.
- Watering: Keep soil slightly moist but not soggy.
Pro Tips
- Pinch off flowers when they appear to keep the plant producing leaves.
- Harvest leaves from the top to encourage bushier growth.
2. Mint (Mentha spp.)
Mint is incredibly refreshing and is great for teas, cocktails, salads, and chutneys. It also helps with digestion and freshens breath.
How to Grow
- Sunlight: Prefers partial sun (4-6 hours).
- Soil: Moist but well-drained soil.
- Watering: Likes consistent moisture but avoid waterlogging.
Pro Tips
- Always plant mint in a separate pot—it spreads aggressively and can take over your garden.
- Trim regularly to keep it from becoming too leggy.
3. Rosemary (Rosmarinus officinalis)
Rosemary has a strong, pine-like aroma and is perfect for seasoning meats, potatoes, and bread. It’s also a hardy herb that can live for years!
How to Grow
- Sunlight: Needs at least 6 hours of full sun.
- Soil: Well-draining, slightly sandy soil.
- Watering: Water sparingly—it prefers dry conditions.
Pro Tips
- Let the soil dry out between waterings to prevent root rot.
- Rosemary can grow into a small shrub, so trim it regularly.
4. Thyme (Thymus vulgaris)
Thyme is a versatile herb that works well in soups, stews, roasted vegetables, and meat dishes. It’s also drought-resistant and easy to maintain.
How to Grow
- Sunlight: Needs 6+ hours of direct sunlight.
- Soil: Well-draining, sandy or loamy soil.
- Watering: Prefers drier soil—water when the top layer is dry.
Pro Tips
- Harvest by snipping stems rather than just picking leaves.
- It’s a great companion plant that repels pests like cabbage worms.
5. Parsley (Petroselinum crispum)
Parsley is more than just a garnish—it’s packed with nutrients and adds a fresh, slightly peppery taste to dishes.
How to Grow
- Sunlight: Prefers partial sun to full sun (4-6 hours).
- Soil: Rich, well-draining soil.
- Watering: Keep soil evenly moist but not soggy.
Pro Tips
- Flat-leaf parsley has a stronger flavor than curly parsley.
- It takes longer to germinate, so be patient!
6. Cilantro (Coriandrum sativum)
Cilantro is essential for Indian, Mexican, and Asian cooking. The leaves have a citrusy, fresh taste, while the seeds (coriander) can be used as a spice.
How to Grow
- Sunlight: Needs 4-6 hours of sunlight.
- Soil: Well-draining soil, rich in nutrients.
- Watering: Keep soil slightly moist but avoid overwatering.
Pro Tips
- Cilantro grows fast but bolts (flowers) quickly in hot weather—harvest often!
- Plant seeds every few weeks for a continuous supply.
7. Oregano (Origanum vulgare)
Oregano is a staple in Mediterranean cooking and pairs well with tomato-based dishes, meats, and roasted vegetables.
How to Grow
- Sunlight: Needs 6+ hours of direct sunlight.
- Soil: Well-draining soil.
- Watering: Water only when soil is dry to the touch.
Pro Tips
- Oregano grows well in dry conditions, so don’t overwater.
- Harvest leaves regularly to encourage growth.
8. Chives (Allium schoenoprasum)
Chives add a mild onion flavor to dishes and are perfect for garnishing eggs, soups, and salads.
How to Grow
- Sunlight: Needs 6+ hours of sun.
- Soil: Well-draining, slightly sandy soil.
- Watering: Water when soil feels dry to the touch.
Pro Tips
- Trim regularly to keep chives growing fresh.
- The purple flowers are edible and add beauty to dishes!
9. Dill (Anethum graveolens)
Dill is great for pickles, seafood, and yogurt-based sauces. It has a slightly sweet, grassy taste.
How to Grow
- Sunlight: Prefers full sun (6+ hours).
- Soil: Well-draining, slightly sandy soil.
- Watering: Keep soil lightly moist.
Pro Tips
- Dill doesn’t transplant well—plant it where you want it to stay.
- Harvest leaves early for the best flavor.
10. Sage (Salvia officinalis)
Sage has a strong, earthy flavor and is perfect for seasoning meats, stuffing, and butter sauces.
How to Grow
- Sunlight: Needs 6+ hours of sun.
- Soil: Well-draining, slightly sandy soil.
- Watering: Water only when the soil is dry.
Pro Tips
- Sage is drought-tolerant—don’t overwater!
- Trim regularly to keep the plant compact.
11. Tarragon (Artemisia dracunculus)
Tarragon has a mild licorice-like flavor and is a key ingredient in French cooking.
How to Grow
- Sunlight: Prefers full sun (6+ hours).
- Soil: Light, well-draining soil.
- Watering: Water sparingly—tarragon likes dry conditions.
Pro Tips
- French tarragon is best for cooking, while Russian tarragon has a milder flavor.
12. Lemongrass (Cymbopogon citratus)
Lemongrass adds a fresh, citrusy kick to Asian dishes and herbal teas.
How to Grow
- Sunlight: Needs 6+ hours of sun.
- Soil: Well-draining soil.
- Watering: Keep soil moist but not soggy.
Pro Tips
- Grow in a large pot—it spreads quickly.
- Cut stalks from the base for the best flavor.
How to Care for Your Herbs

Herbs don’t need a lot of work, but a little care goes a long way. Follow these simple tips to make sure your plants stay strong, flavorful, and productive.
Watering Tips
Herbs need just the right amount of water—too little, and they dry out; too much, and their roots rot.
General Watering Rules:
- Check the soil before watering—if the top inch feels dry, it’s time to water.
- Water deeply but less often. This encourages strong root growth.
- Avoid wet leaves—watering at the base prevents mold and disease.
- Use pots with drainage holes so excess water can escape.
Watering Frequency by Herb Type:
- Drought-tolerant herbs (rosemary, thyme, oregano, sage) need less water. Water once a week.
- Moisture-loving herbs (mint, basil, cilantro, parsley) need more frequent watering, about 2-3 times per week.
- Potted herbs dry out faster, so check them daily in hot weather.
Pruning
Pruning and harvesting aren’t just for picking fresh leaves—they also help your herbs grow better!
Why Pruning Matters
- Keeps plants bushy and prevents them from getting tall and leggy.
- Encourages more leaf growth instead of flowers and seeds.
- Improves air circulation, reducing disease risk.
How to Prune Herbs Correctly
- Basil & Mint → Pinch off the top leaves regularly to promote branching.
- Thyme & Oregano → Trim stems down to about 3 inches to encourage new growth.
- Rosemary & Sage → Cut back a few inches at a time, but never remove more than ⅓ of the plant.
- Cilantro & Dill → These herbs grow fast—harvest often to prevent bolting (going to seed too early).
Fertilizing Your Herbs
Herbs don’t need a lot of fertilizer, but a little boost helps them grow stronger.
Best Fertilizers for Herbs
- Organic compost → Best for enriching soil naturally.
- Liquid seaweed or fish emulsion → Provides mild, natural nutrients.
- Diluted all-purpose fertilizer → Use sparingly (once a month).
Fertilizing Tips:
- Leafy herbs (basil, parsley, cilantro) like nitrogen-rich fertilizers.
- Mediterranean herbs (rosemary, thyme, oregano, sage) prefer lean soil—too much fertilizer weakens their flavor.
- Never overfeed! Too much fertilizer can make herbs taste less flavorful.
Dealing with Common Pests and Diseases
Even the best-kept herb gardens can attract pests. Here’s how to keep them away without using harsh chemicals.
Common Herb Garden Pests:
- Aphids → Tiny green or black bugs that suck sap from leaves.
- Whiteflies → Small flying insects that leave a sticky residue.
- Spider mites → Cause tiny yellow spots on leaves.
- Slugs & Snails → Love to munch on soft herbs like basil.
Natural Pest Control Methods:
- Spray with neem oil → A natural pesticide that’s safe for herbs.
- Use soapy water → A mild solution of dish soap and water can deter aphids.
- Attract ladybugs → They eat aphids and other pests.
- Sprinkle crushed eggshells around plants to keep slugs away.
Preventing Diseases:
- Water in the morning so leaves dry quickly.
- Don’t overcrowd plants—good airflow prevents mold.
- Remove any yellow or spotted leaves to stop disease spread.
Winter Care for Herbs
If you live in a place with cold winters, some herbs need extra care.
Hardy Herbs That Survive Winter:
- Rosemary
- Thyme
- Sage
- Oregano
These can stay outside, but covering them with mulch helps protect the roots.
Tender Herbs That Need Protection:
- Basil
- Mint
- Cilantro
- Dill
Move these inside or grow them in pots so you can bring them indoors when it gets too cold.
Final Thoughts on Herb Care
Taking care of herbs is simple once you get the hang of it. Just remember:
✅ Water when needed (not too much, not too little).
✅ Trim often to keep plants healthy.
✅ Watch out for pests and deal with them naturally.
✅ Give your plants some food, but don’t overdo it.
Follow these easy steps, and your herb garden will stay green, flavorful, and productive all year long!
Harvesting and Storing Herbs

Growing herbs is rewarding, but knowing how to harvest and store them properly makes all the difference. Harvesting at the right time and using the best storage methods ensures your herbs stay fresh and flavorful for as long as possible.
When to Harvest Herbs
Timing is everything when it comes to harvesting herbs. Picking leaves too early or too late can affect their flavor and growth.
Best Time to Harvest Herbs
🕖 Harvest in the morning – Essential oils (which give herbs their flavor) are strongest before the sun gets too hot.
🌿 Pick before flowering – Once herbs start flowering, their leaves can become bitter. Regular harvesting helps prevent this.
✂ Snip, don’t strip – Always leave at least one-third of the plant so it keeps growing.
Here’s a quick guide to when different herbs are at their best:
| Herb | Best Time to Harvest |
|---|---|
| Basil | When plants are 6-8 inches tall, before flowers appear |
| Mint | Anytime, but best before flowering |
| Parsley | Once leaves are fully grown, cut from the outer edges |
| Cilantro | Before flowers form, leaves become bitter after flowering |
| Thyme | Just before it flowers for the best taste |
| Oregano | When stems are 4-6 inches long, before flowering |
| Rosemary | Anytime, but best in spring and summer |
| Chives | When leaves are 6 inches long, cut at the base |
How to Harvest Different Types of Herbs
- Leafy Herbs (Basil, Mint, Parsley, Cilantro)
- Pinch or snip leaves just above a set of healthy leaves to encourage more growth.
- Never remove more than ⅓ of the plant at once.
- Woody Herbs (Rosemary, Thyme, Oregano, Sage)
- Use sharp scissors to cut a few inches of stem, just above a leaf node.
- Avoid cutting into the hard, woody part—stick to soft green stems.
- Chives & Green Onions
- Cut stems about an inch above the soil. They will regrow quickly.
How to Store Fresh Herbs
Freshly harvested herbs can last a while if stored properly. Here’s how to keep them fresh:
Short-Term Storage (1-2 Weeks)
For herbs you’ll use within a few days:
- In water (like flowers) → Trim the stems and place them in a glass of water. Cover with a plastic bag and store in the fridge. Great for parsley, cilantro, and basil (though basil prefers room temperature).
- In the fridge → Wrap herbs in a damp paper towel, then place in a resealable bag. Works well for thyme, oregano, and rosemary.
Long-Term Storage (1-12 Months)
If you have more herbs than you can use, try these methods:
Drying Herbs (Best for: Rosemary, Thyme, Oregano, Sage)
- Gather small bunches and tie them with string.
- Hang them upside down in a warm, dry place away from sunlight.
- Once fully dry (about 1-2 weeks), crumble the leaves and store them in airtight jars.
Freezing Herbs (Best for: Basil, Mint, Parsley, Cilantro, Chives)
- Chop fresh herbs and place them in ice cube trays.
- Fill the tray with olive oil or water and freeze.
- Use frozen herb cubes in soups, sauces, or stir-fries.
How Long Do Stored Herbs Last?
| Storage Method | How Long Herbs Last |
|---|---|
| Fresh in water (jar method) | 1-2 weeks |
| Fresh in the fridge | 5-7 days |
| Dried (air, oven, or dehydrator) | 6-12 months |
| Frozen (whole leaves) | Up to 6 months |
| Frozen (ice cube method) | Up to 1 year |
How to Keep Herbs Flavorful After Harvest
Even after harvesting, you want your herbs to stay as flavorful as possible.
Avoid These Common Mistakes:
❌ Washing before storage – Only wash herbs right before use, as extra moisture causes mold.
❌ Storing near strong-smelling foods – Herbs absorb odors easily, which can change their taste.
❌ Over-drying – Drying too long can make herbs lose flavor. Keep them in a dry place, but don’t overdo it.
Best Ways to Retain Flavor:
✔ Use airtight containers – Store dried herbs in glass jars away from heat and light.
✔ Label everything – Dried herbs all look similar! Label them with the name and harvest date.
✔ Use dried herbs within a year – They start losing potency after 12 months.
How to Use Your Stored Herbs
Once you’ve got a good stash of dried or frozen herbs, the fun part begins—using them in cooking!
Using Dried Herbs vs. Fresh Herbs in Cooking
- Dried herbs are more concentrated → Use ½ teaspoon dried for every 1 teaspoon fresh.
- Add dried herbs early in cooking (soups, stews) so flavors have time to develop.
- Add fresh herbs at the end (salads, pasta, garnishes) to keep their bright flavor.
Creative Ways to Use Herbs
- Make herbal butter → Mix chopped herbs with softened butter and refrigerate.
- Herb-infused oils → Add rosemary, thyme, or basil to olive oil for extra flavor.
- DIY herbal teas →
Conclusion
If you’ve made it this far, you’re now equipped with everything you need to start growing your own fresh, flavorful herbs right in your kitchen garden. Whether you have a big backyard, a small balcony, or just a sunny windowsill, you can grow basil, mint, rosemary, and more with just a little effort.